
 Pin it
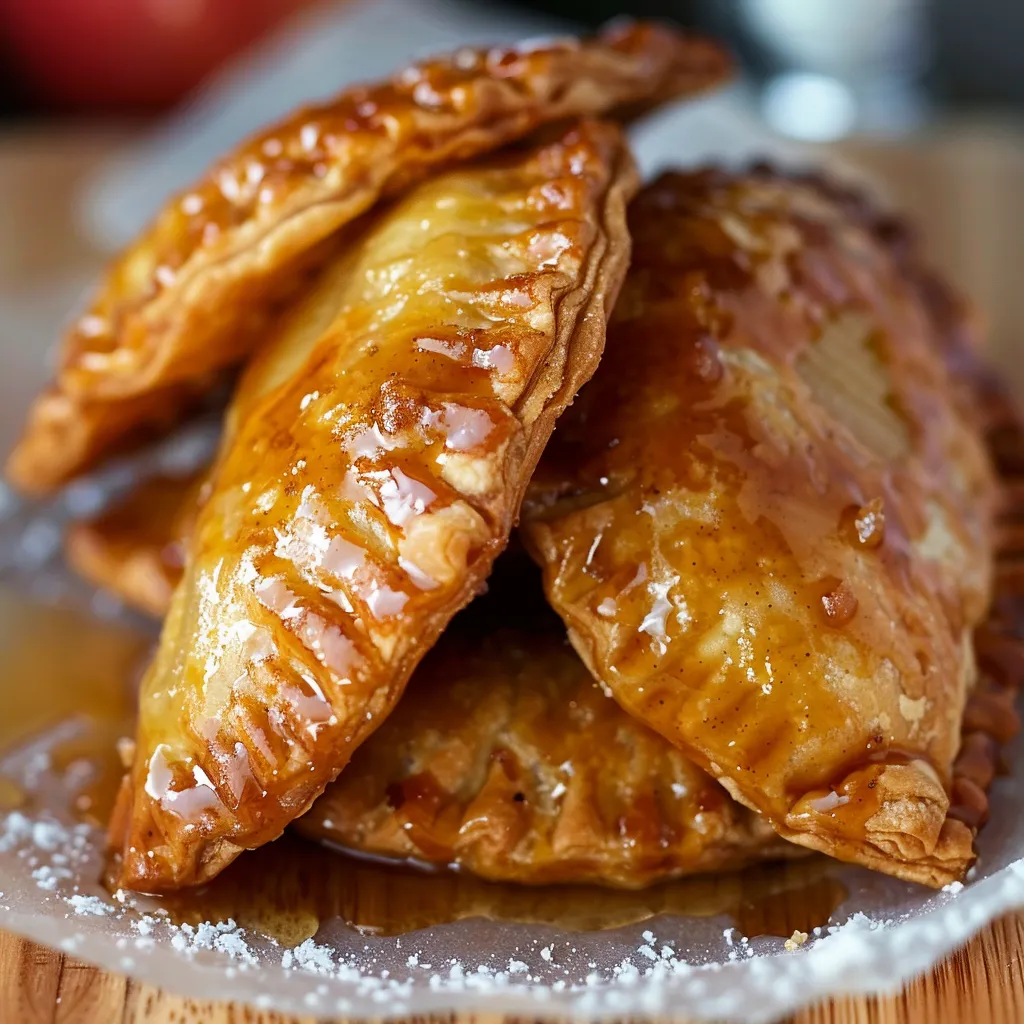
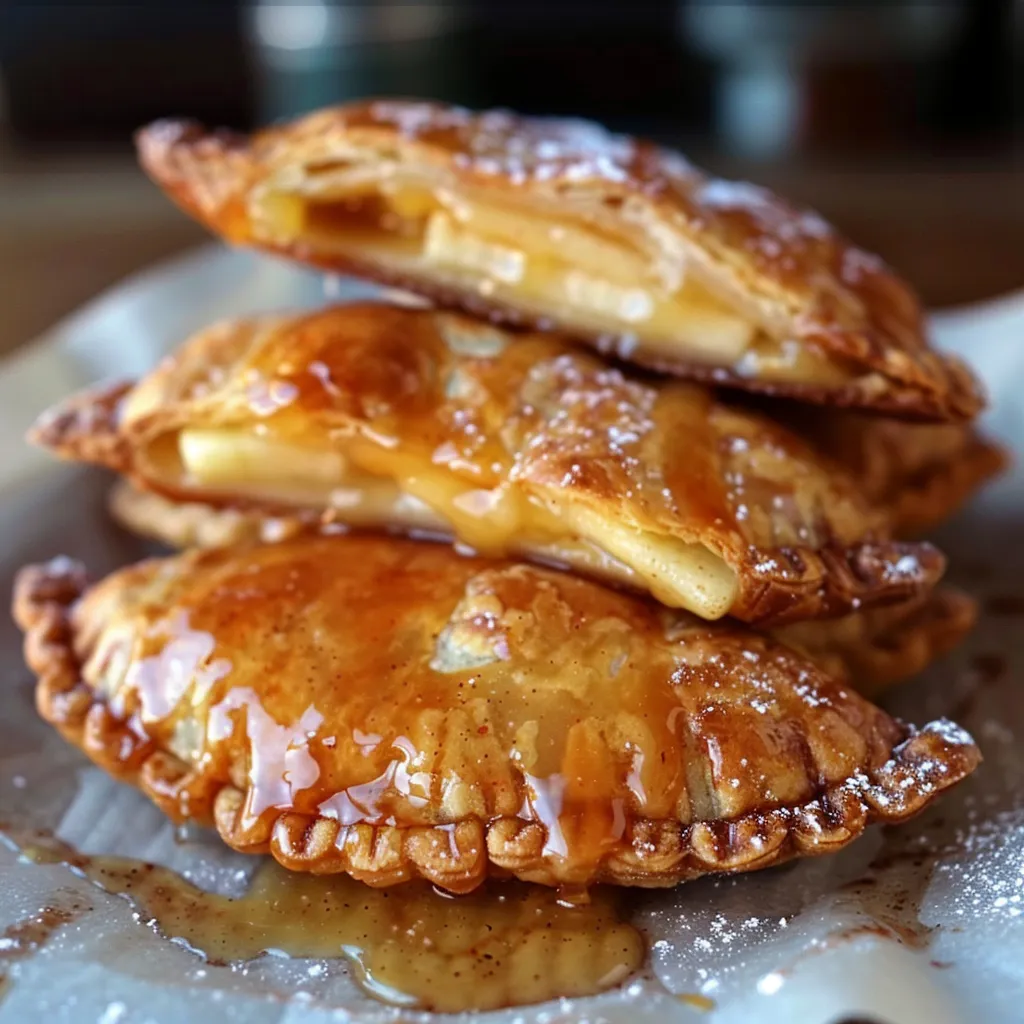
This incredible combo brings two dessert favorites together - the warming goodness of apple pie meets the smooth richness of cheesecake in a handheld delight. You'll love the way the crunchy fried shell contrasts with the soft, tasty filling inside - it's a treat that'll have everyone coming back for more.
I whipped these up for the first time when my daughter couldn't pick between apple pie or cheesecake for her birthday. They were such a smash hit that now we can't have any family celebration or holiday without them.
What You'll Need
- Granny Smith or Honeycrisp apples: Give that perfect sweet-tart balance and won't turn mushy when you cook them
- Unsalted butter: Makes a luscious base for your apple mix without extra salt
- Brown sugar: Adds those yummy caramel flavors that work so well with apples
- Ground cinnamon and nutmeg: Bring that cozy, spicy kick to your filling
- Cornstarch: Keeps your filling thick so it stays put inside the pie
- Vanilla extract: Gives a lovely flavor boost to your apple mixture
- Cream cheese: Creates the cheesecake part - go for full fat for the tastiest results
- Powdered sugar: Makes your cheesecake filling sweet and silky smooth
- Refrigerated pie dough: Speeds things up, but homemade works great too
- Egg wash: Helps keep everything closed and makes the outside golden
- Frying oil: Creates that irresistible crispy outer layer
How To Make Them
- Get Your Apple Filling Ready:
- Put your skillet on medium heat and let the butter melt completely. Toss in your apple chunks (cut them about ¼ inch small so they cook evenly). Throw in the brown sugar, cinnamon, and nutmeg, then stir until the apples are all coated. Let everything cook for about 5-7 minutes, giving it a stir now and then, until the apples get soft but aren't mushy. Once they've released their juices, pour in the cornstarch mixture and keep stirring for about 30 seconds until everything thickens up nicely. Turn off the heat, add the vanilla, and scrape up all those tasty bits from the bottom. Dump it all into a bowl and let it cool completely before you start putting your pies together.
- Mix Up The Cheesecake Part:
- Make sure your cream cheese is nice and soft to avoid any lumps. Grab a medium bowl and beat the cream cheese with powdered sugar using an electric mixer on medium for about 2 minutes until it's super smooth and fluffy. Give it a taste and add more sugar if needed. Cover it up and pop it in the fridge until you're ready, but let it warm up a bit before assembly so it spreads easier.
- Put Your Pies Together:
- Sprinkle some flour on your counter and roll out the pie dough to about 1/8 inch thick. Cut out as many 4-5 inch circles as you can, using a cutter or small bowl. Put a teaspoon of the cheesecake mix a bit off-center on each circle, then add one or two teaspoons of the apple filling beside it. Don't overstuff them! Brush some egg wash around the edges, fold the dough over to make a half-moon, and press the edges firmly with your fingers. Use a fork to crimp the edges so they stay closed and look pretty. Put them on a parchment-lined baking sheet and chill for 15 minutes to firm up.
- Fry Them Up Golden Brown:
- Pour about 2 inches of oil in a heavy pot and heat it to 350°F - use a thermometer to get it right. Cook just 2 or 3 pies at a time, carefully lowering them into the hot oil with a slotted spoon. Let them fry for 2-3 minutes on each side, watching carefully since they can brown fast. You want a nice deep golden color. Move them to a plate lined with paper towels to drain. While they're still warm, sprinkle generously with cinnamon sugar or powdered sugar for an extra sweet touch.
 Pin it
My grandma always added just a tiny bit of salt to her apple filling. She called it her special trick for making the flavors pop. I thought it was just an old wives' tale until I tried it myself - turns out she was onto something! That little pinch really does bring out all the sweetness and flavor in the apples.
Keeping Them Fresh
These handheld treats taste best right after frying when they're still crisp outside and warm inside. But if you've got leftovers, you can keep them in a sealed container at room temp for a couple days. Need longer? They'll last in the fridge for up to 5 days. To get them crispy again, warm them in a 350°F oven for about 10 minutes. Skip the microwave though - it'll just make your beautiful crust all soggy and ruin what makes these pies so great.
Change It Up
Once you've got the hang of these stuffed pies, you can go wild with different fillings. Try swapping apples for pears with a bit of ginger, or use fresh berries in summer. Want something tropical? Mix diced mango with a little lime zest. You can play with the cheesecake filling too - add some orange zest, a drop of almond extract, or even a splash of bourbon for grown-up gatherings. Don't be afraid to try different spices like cardamom or Chinese five spice to give your pies a special twist that'll wow your friends and family.
Perfect Pairings
These pies are amazing on their own but you can take them to the next level with a few extras. Serve them warm with a scoop of vanilla ice cream for that hot-cold magic. A little drizzle of caramel or maple syrup makes them extra decadent. Having a brunch? Serve alongside fresh fruit and strong coffee to balance the sweetness. During the colder months, they're the perfect ending to a family dinner, especially with warm apple cider or hot chocolate topped with a dollop of whipped cream.
 Pin it
These little hand pies hit that sweet spot between homey comfort food and fancy treat, making them perfect for just about any occasion you can think of.
Frequently Asked Questions
- → Which apples are best for this treat?
Firm apples like Granny Smith and Honeycrisp provide just the right balance of tartness to pair with the creamy filling.
- → Can I bake them instead of frying?
Absolutely! Bake at 375°F (190°C) for 20–25 minutes until they’re crisp and golden for a lighter version.
- → How can I stop the filling from leaking?
Seal the edges well with a fork and use a little egg wash to make sure the dough stays closed during frying.
- → Can I prep these in advance?
Assemble them ahead and keep them in the fridge for a day or freeze up to a month before cooking.
- → What’s the best kind of oil for frying?
Stick with neutral oils like vegetable or canola because they handle high heat and won’t overpower the flavors.
- → How do I store leftovers?
Put them in a sealed container in the fridge for 2–3 days. Reheat in the oven or air fryer to keep them crispy.