
 Pin it
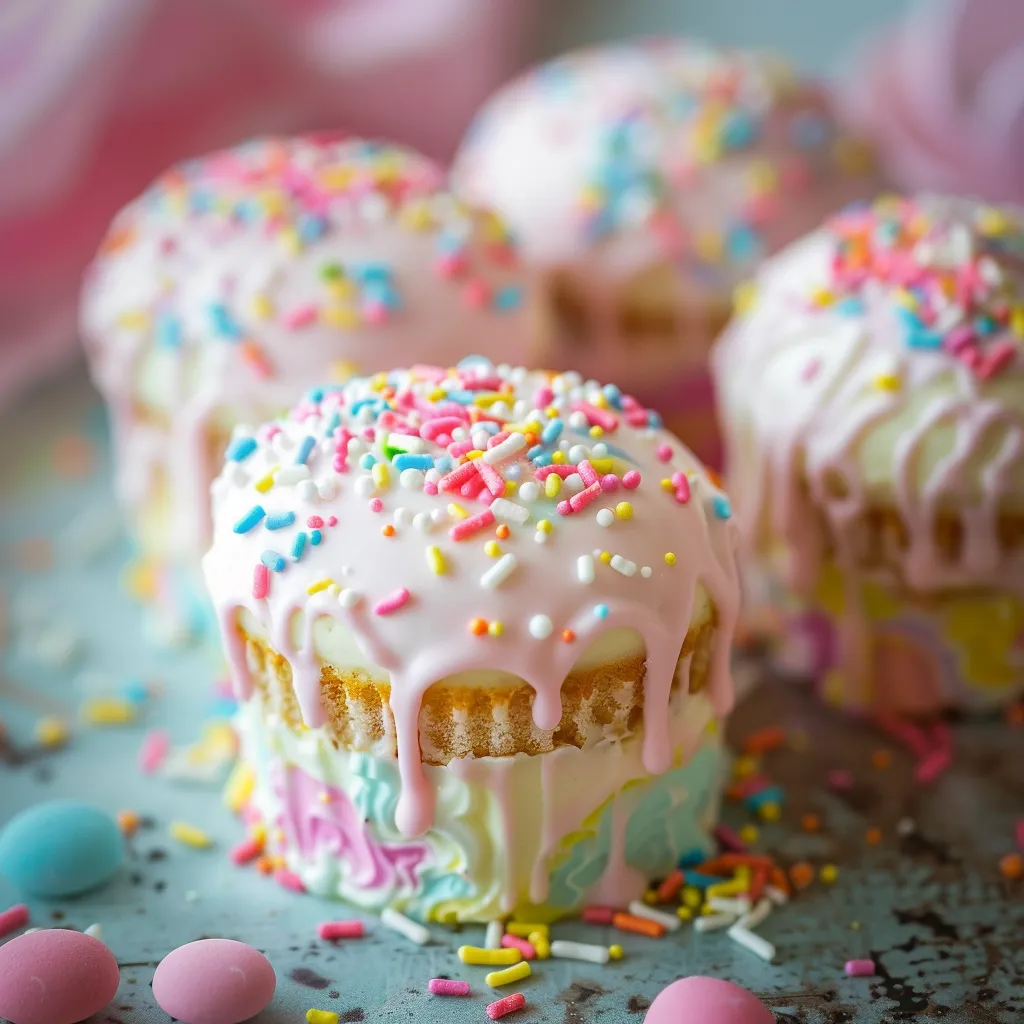
These cute Easter Egg Mini Snack Cakes turn ordinary vanilla cake mix into fun egg-shaped goodies that'll wow everyone at your Easter get-together. With fluffy marshmallow buttercream tucked between soft cake layers and a smooth vanilla coating, these mini treats bring back memories of store-bought snacks but with a homemade touch and Easter spirit.
I've been bringing these egg-shaped treats to family gatherings since I first made them for my nieces a few years back. Now they look forward to "Aunt Michelle's Easter eggs" when spring comes around and they always jump in to help decorate.
Ingredients
- White cake mix: Makes a trusty foundation for these treats and gives you great results every time
- Canola oil: Gives the cake a super soft texture and keeps everything nice and moist
- Sour cream: My hidden trick that adds extra richness and fights off any dryness
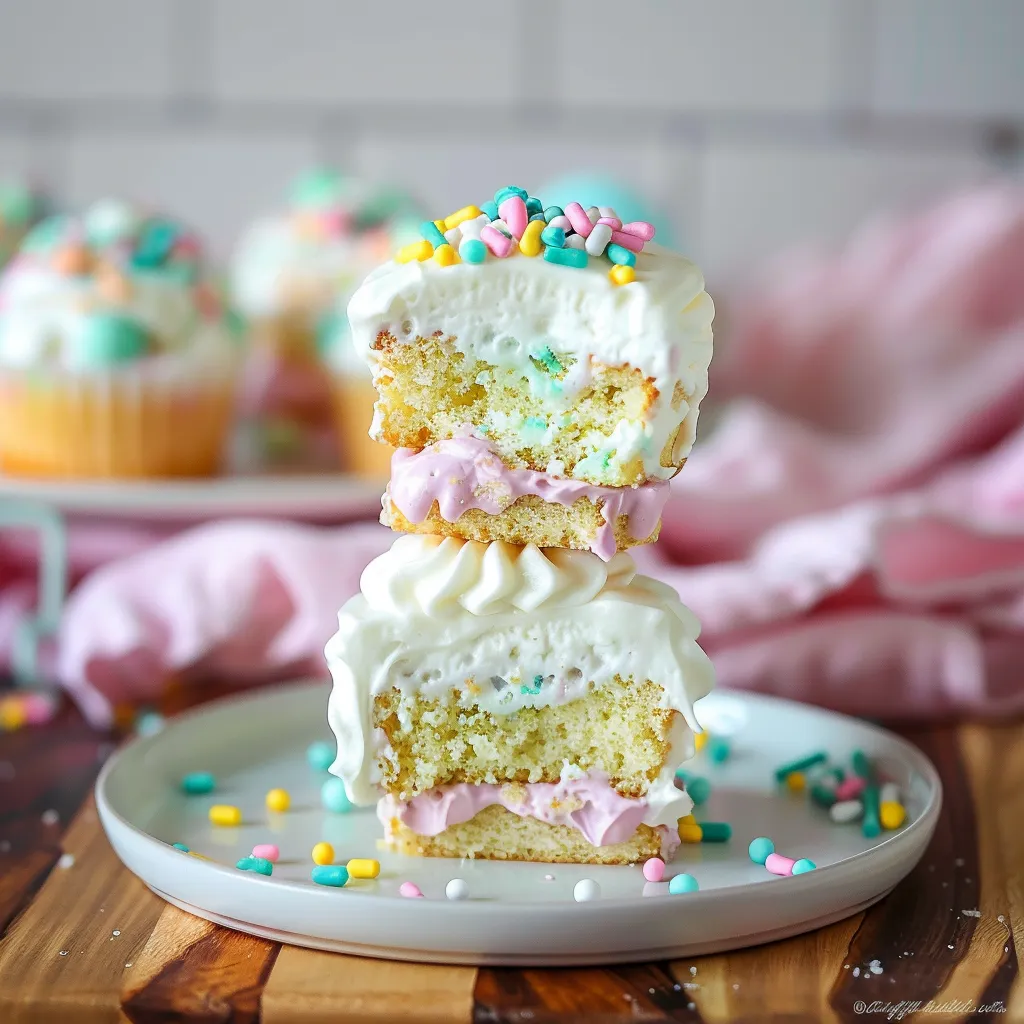
- Marshmallow fluff: Delivers that dreamy creamy center that makes you think of childhood snack cakes
- Almond extract: Added to both cake and frosting for that mystery flavor that gets people asking for your secrets
- Vanilla almond bark coating: Hardens perfectly without any fuss - much easier than working with chocolate
Step-by-Step Instructions
 Pin it
- Prepare the Batter:
- When you mix the cake mix with the wet stuff, don't rush it - beat everything for 2 full minutes until it looks smooth and a bit fluffy. The sour cream we're adding is what makes it taste homemade instead of from a box.
- Bake the Sheet Cake:
- Spread your batter all the way to the edges of your parchment-lined pan so it bakes evenly. Keep an eye on it after about 15 minutes since thin cakes can burn quickly. You'll know it's done when it bounces back slightly when touched and has just a hint of gold around the edges.
- Cut and Fill:
- After it's totally cool, push your cookie cutter straight down in one go instead of sawing around to get clean shapes. When adding the filling, start piping from the outside and work your way in, but leave some space at the edges so filling doesn't squeeze out when you put the pieces together.
- Coat the Cakes:
- You absolutely must chill these cakes first or they'll fall apart when dipped. Use one fork underneath and another to help pour the coating over the cake for total coverage. Let it drip for about 10 seconds before moving it so you don't get puddles forming around the bottom.
I still laugh about the time my youngest put her egg cake on a tiny plate by her bed, determined to save it for Easter Sunday. She waited three whole days and then proudly told me it was totally worth the wait.
Smart Uses for Leftover Cake
Don't toss those extra cake bits after cutting out your eggs! Roll them into balls with a bit of frosting for quick cake pops. Or just crumble them over ice cream for an instant topping. You can even layer them with pudding in glasses for a quick dessert. My kids actually fight over these scraps while we're putting the cakes together - they make perfect little snacks.
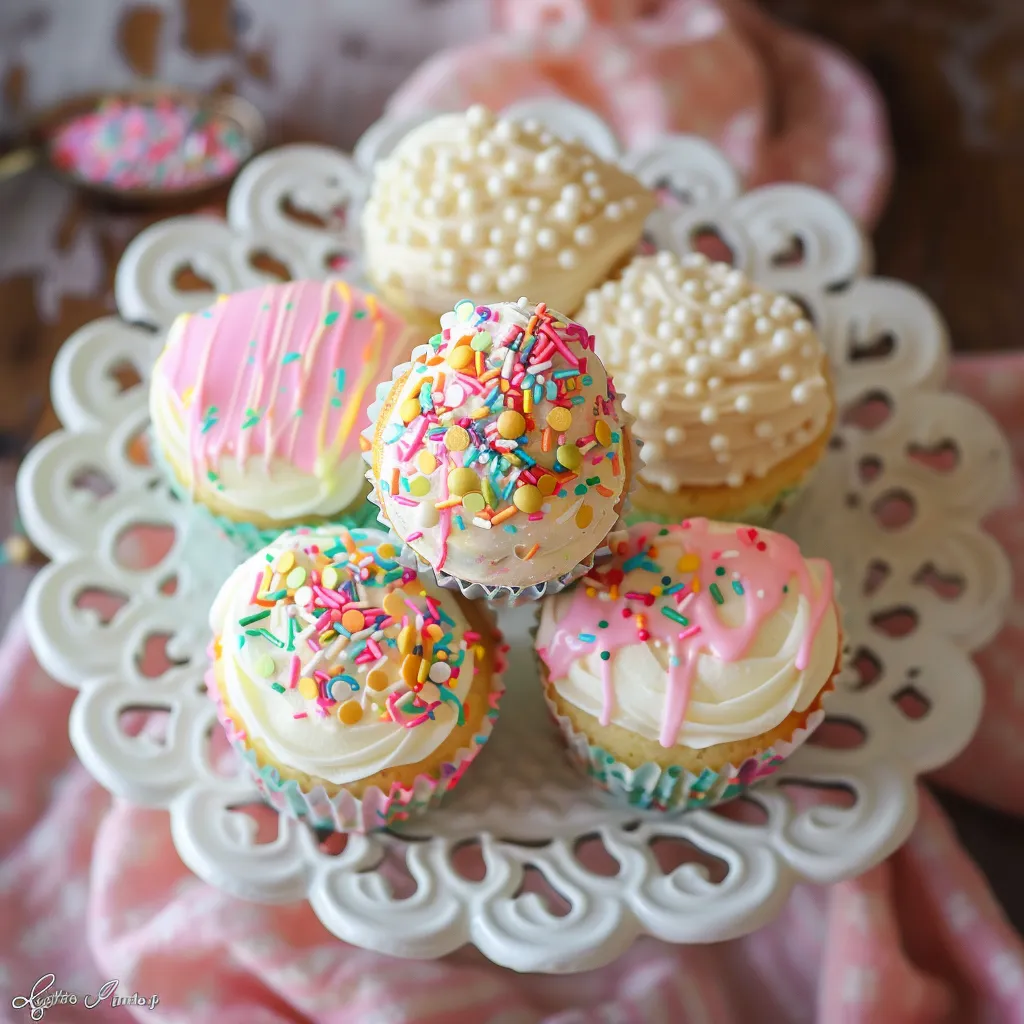
Fun for All Ages
Getting kids involved makes this recipe twice as fun. Little ones can handle sprinkling while bigger kids might want to try different decorating patterns. Set up a little station with colored coatings and various sprinkles so everyone can design their own egg cake. We really love using pastel drizzles with matching tiny sprinkles or chocolate drizzles with rainbow toppings.
Prep Ahead and Storage
These little cakes actually taste better after sitting for a day as the flavors come together. Keep them in a covered container in your fridge for up to 5 days. Take them out about 20 minutes before serving so they aren't too cold. If you need to stack them, just put some parchment paper between layers so they don't stick together. I wouldn't freeze them though - when they thaw, the coating gets all wet and doesn't look nearly as pretty.
Easter Table Centerpiece
Show off these egg treats on a cake stand with some fresh flowers or nestled in colorful Easter grass. They go great with fruit and coffee at a brunch. You can even hide them among candy-filled plastic eggs for an Easter hunt - they'll be the special prize everyone hopes to find!
 Pin it
Have fun creating these Easter treats that'll put smiles on everyone's faces!
Frequently Asked Questions
- → What's the easiest way to shape the cakes like eggs?
An egg-shaped cookie cutter works wonders. Make sure your cake is completely cooled first so it doesn't fall apart.
- → How do I make the almond bark coating smoother?
Chill or freeze your cakes for 30 to 60 minutes before dipping them. This keeps them firm and makes them less likely to break in the coating process.
- → Can I add color to the almond bark?
Yes, you can use gel food coloring for bright designs. Add it to the melted bark or drizzle extra colors on top as decoration.
- → What can I swap the almond extract for?
Skip almond extract and use more vanilla or something fruity like orange or coconut extract for a new flavor.
- → How do I store these cakes after decorating?
Keep them in a container that's airtight and refrigerate them for up to 5 days. Let them reach room temperature before serving for better flavor.