
 Pin it
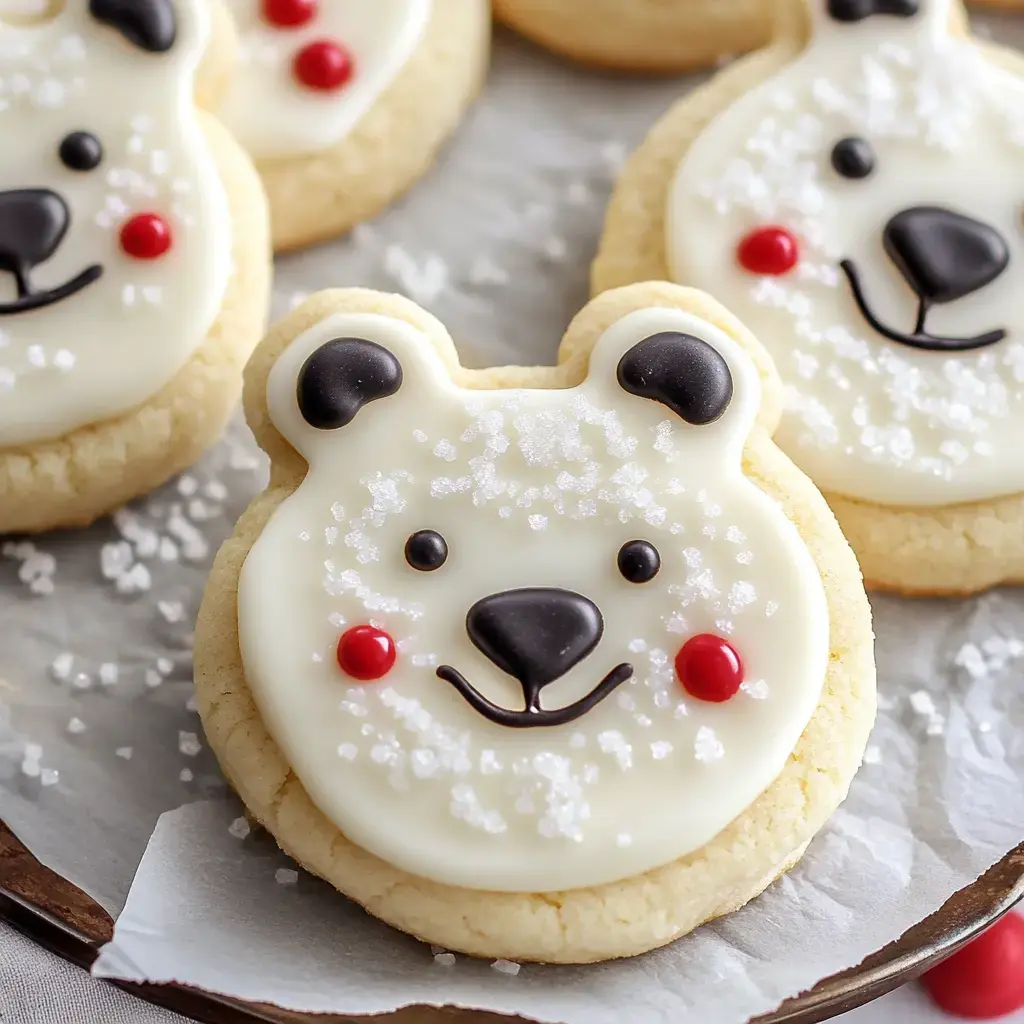
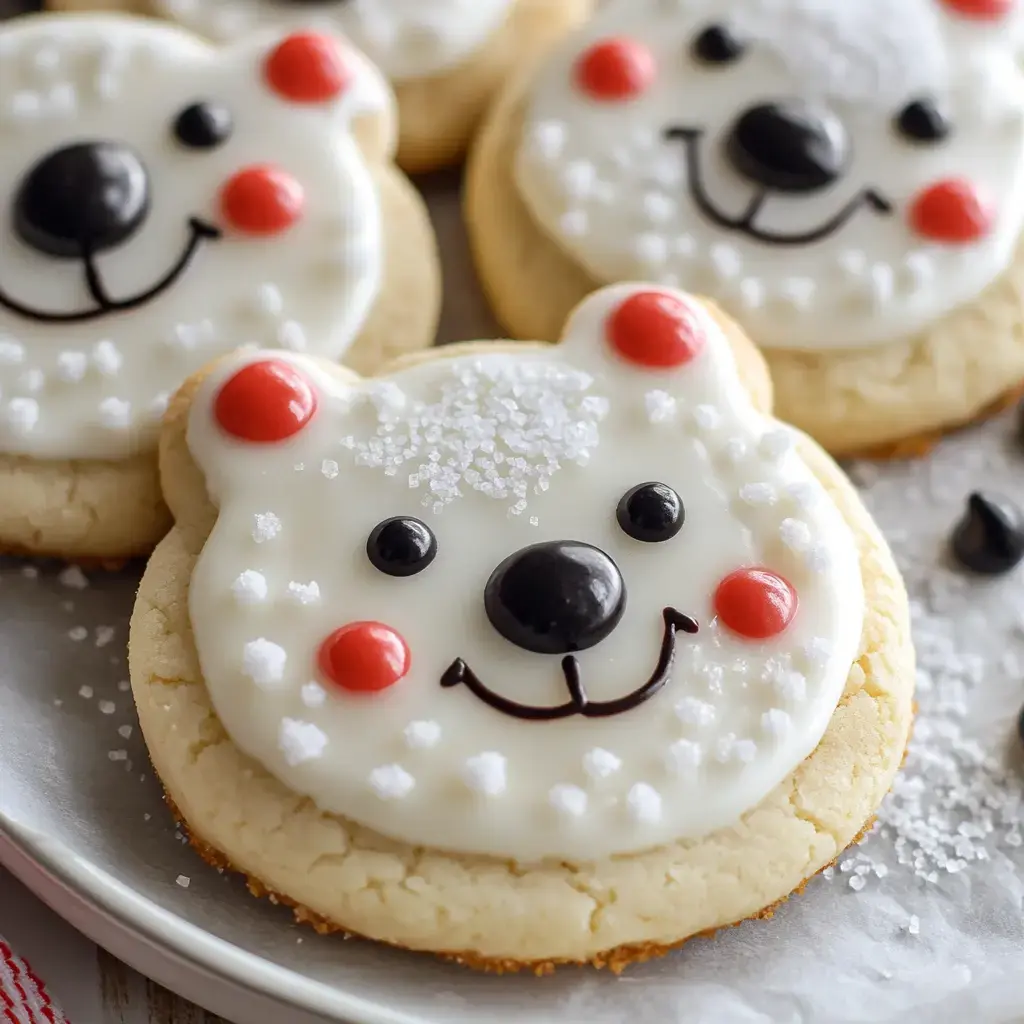
I get so excited every winter to whip up these cute Polar Bear Cookies. What started as a fun kitchen project with my kids has turned into our favorite holiday tradition. These tender cream cheese treats with their cloud-like buttercream topping are tiny edible masterpieces that taste incredible. Nobody can hold back a smile when they spot these adorable bear faces—their charm is totally irresistible.
Why These Treats Stand Out
What makes these cookies magical is their incredible texture—soft and velvety from the cream cheese mixed with that dreamy, light-as-air buttercream on top. They're a blast to create, gorgeous to look at, and downright tasty. Whenever I take them to holiday gatherings, they're always the first snacks to vanish from the table.
Prep Work
- Must-Have Tools: You'll need round cookie cutters, quality baking trays and some parchment paper. My stand mixer is my go-to, but don't worry—a handheld mixer works just fine too.
- Must-Have Ingredients: Make sure your butter and cream cheese are completely softened, grab some genuine vanilla for better flavor, and don't forget cornstarch—it's the secret to that melt-away softness.
Creating Your Polar Bears
- Whipping Up Your Base
- Start with room temperature cream cheese and butter so they blend smoothly. When you mix them with sugar, they become incredibly airy. Add your dry stuff next, then comes the tough part—waiting while your dough gets cold!
- Forming The Bears
- Rolling out the dough creates tiny polar bear bases. I grab a larger circle for the head and two small ones for ears. The secret is attaching those ears with a soft press—they'll stick together during baking.
- Oven Watch
- That extra time in the fridge before baking really matters—your bears won't spread out. Keep an eye on them while they bake; you want just a hint of gold around the edges. They'll be wonderfully soft once they cool down.
- Bringing Bears To Life
- Now the magic happens! Spread white buttercream first, then give them a quick sparkly sugar bath for that snowy look. Those tiny chocolate chip eyes and colorful sprinkle noses turn them into the sweetest polar bears around.
Put Your Spin On Them
I love how adaptable these treats are. I've made them for friends with dairy issues using plant-based butter substitutes and they turn out fantastic. The frosting works wonderfully with coconut cream too. You can even try gluten-free flour mixes—just pick one with xanthan gum so they hold together nicely.
Tricks I've Learned
After countless batches, I've picked up some handy shortcuts. Keep your dough rolled evenly throughout for balanced baking. Don't try to rush through the cooling steps—you'll regret it. And when you're adding the decorations, let your imagination run wild—each bear can show off a different look.
Storage Secrets
These bears stay yummy for a while, but timing matters. After decorating, they'll remain perfect for a couple days at room temp in a sealed container. Need them to last longer? Stick them in your fridge and they'll stay good nearly a week. I love making dough ahead and stashing it in the freezer—when life gets crazy, having cookie dough on standby feels like a kitchen superpower.
Time Well Spent
Sure, these polar bear treats take more effort than regular cookies, but the happiness they create makes it totally worth it. There's something magical about seeing a tray of these sweet bears lined up, each with its own unique look. They aren't just cookies—they're tiny edible art pieces that bring smiles to faces.
Fun Design Ideas
Let me share some cool ways to dress up your bears. Sometimes I use tiny fondant hearts as noses or food markers to draw funny faces. During Christmas, I'll sprinkle tiny red and green bits to make them festive. My kids go wild giving each bear a different personality—some look startled, others drowsy, like we're making tiny cookie characters.
Great For Giving
These bears make wonderful presents. I pack them carefully in holiday containers with parchment between layers. I often tuck the instructions inside since everyone asks for them. Nothing shows you care like a box of handcrafted polar bear cookies each one fixed up with love. They're particularly wonderful for families with kids—their faces just light up when they see these cute treats.
Kids Can Join The Fun
Some of my best memories come from making these cookies with children around. Small hands work great for cutting out circles and pushing on those ears. Decorating time brings the biggest laughs though. I set up a decorating spot with all the toppings and let them go wild. Yeah, it gets messy, but those laughs and proud looks make cleanup feel like nothing.
More Than Just Bears
While I adore the polar bear style, this dough works amazingly for any shape you want. Throughout the year we turn them into snowmen, reindeer or even little penguins. The cream cheese mix keeps its form really well, and that white frosting creates a blank canvas for whatever you can dream up. It's basically one fantastic recipe that changes with the seasons.
Their Special Magic
These polar bear cookies have grown into more than just a sweet treat—they're part of our most treasured moments. I've served them alongside hot chocolate, watching kids' faces light up at their first glimpse of these cute creations. At parties, everyone wants to chat about them and share their own cookie stories. It's amazing how a simple treat can pull people together and create such delight.
Creating The Mood
When I throw holiday gatherings, I love showcasing these cookies in style. I might arrange them on tiered stands surrounded by fake snow or glittery decor. A pot of warm cider or cocoa nearby makes a perfect match. For kids' parties, I'll sometimes create a cookie fixing station so little ones can add their own touches to plain frosted bears. These small extras turn a simple cookie into something folks won't forget.
 Pin it
Frequently Asked Questions
- → Is it possible to prep these cookies early?
- Sure! Keep them decorated for a couple of days on the counter, up to five days in the fridge, or stash them in the freezer for one month. You can also freeze the dough for later.
- → Why chill the dough more than once?
- It stops spreading and makes the cookies softer. Cutting shapes then chilling before baking keeps them detailed and neat.
- → What’s the best way to stack them?
- Chill the cookies well first, then layer them with parchment in between. The frosting stays firm but soft, so handle gently.
- → Can I swap the decorations?
- Of course! Use whatever details you’ve got handy. Try colorful sprinkles or fondant for fun facial features.
- → Can I make a smaller batch?
- Totally! Just cut the ingredients in half (use half an egg). Avoid doubling unless your mixer is extra large.