
 Pin it
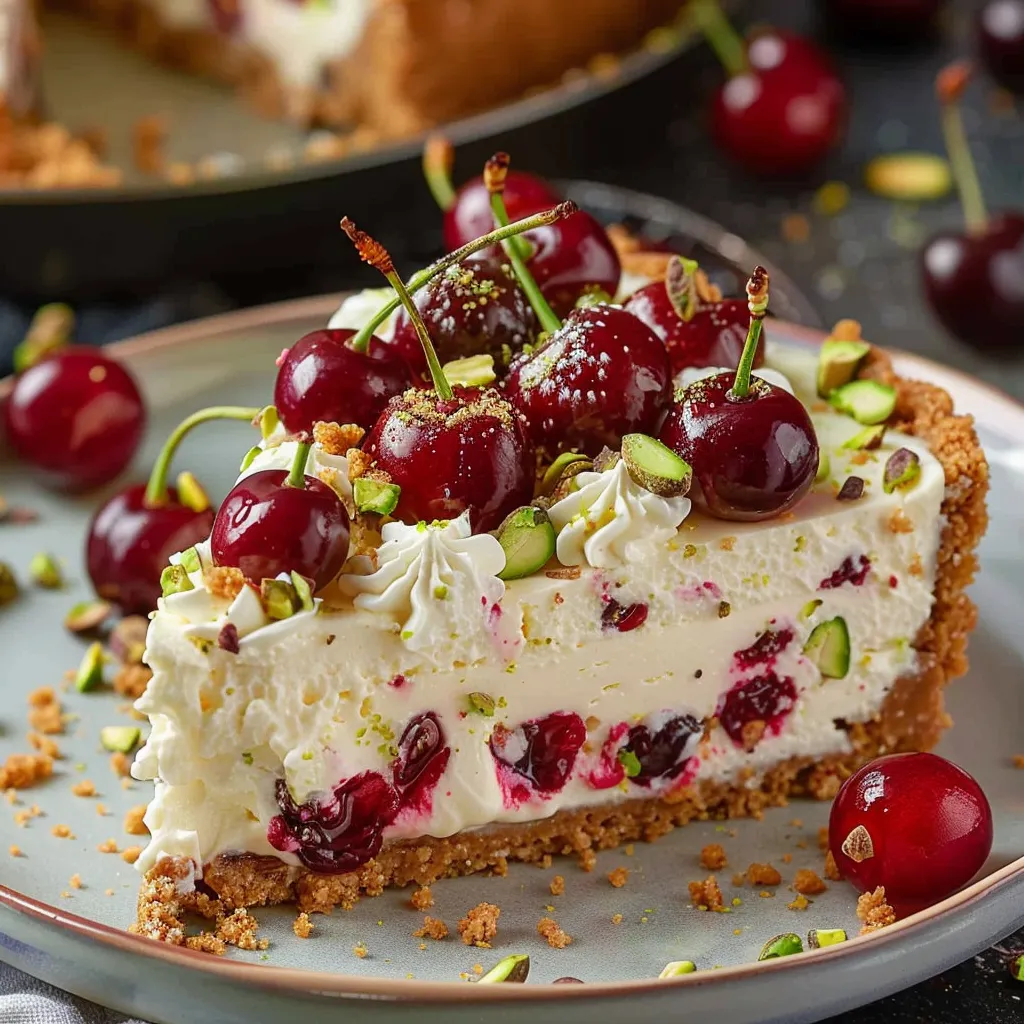
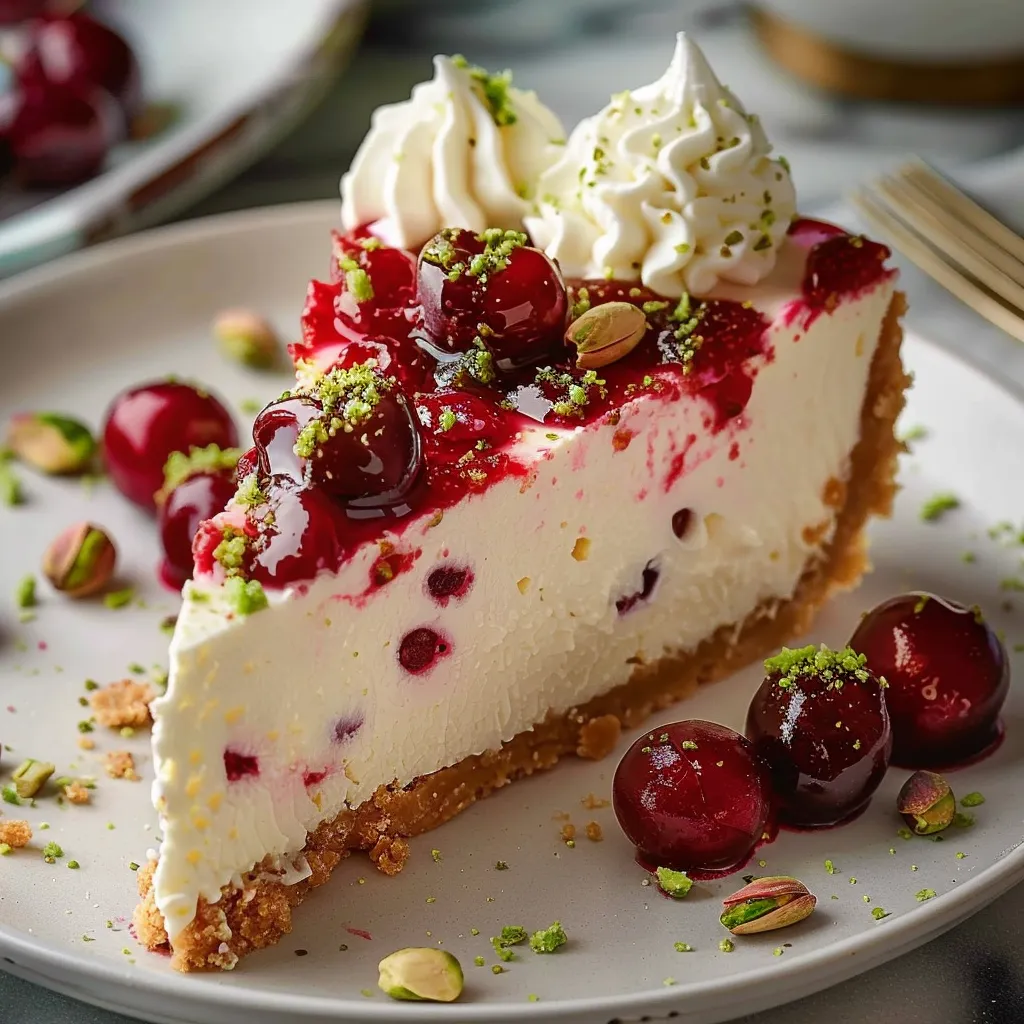
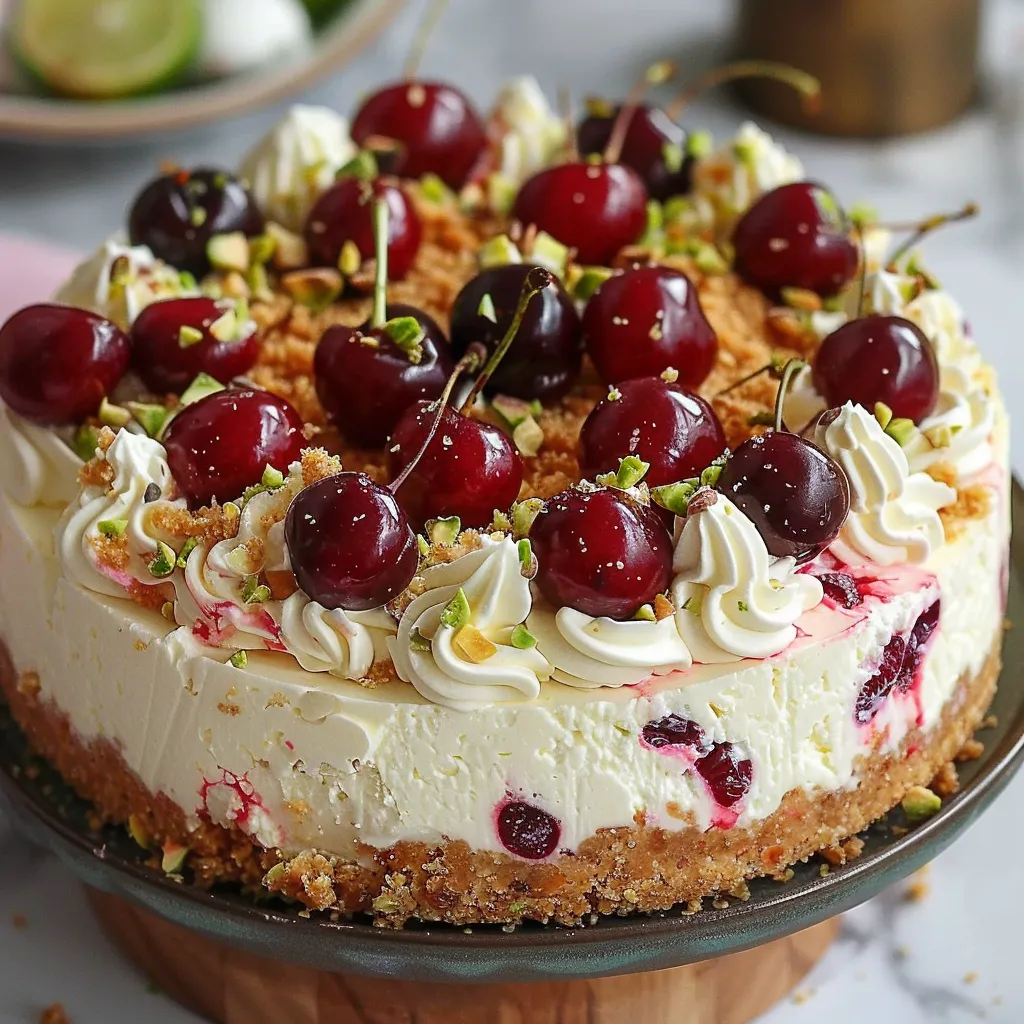
This zesty cherry pistachio cheesecake blends tart citrus notes with juicy cherries and nutty pistachios for a mind-blowing dessert. The velvety, silky filling works so well with the crumbly graham base, creating a flavor explosion that'll win over even your pickiest guests.
I whipped this up for my sister's birthday after she wanted something featuring both cherries and pistachios. The bright colors and tastes were such a success that we now make it for all our family celebrations.
What You'll Need
- Graham cracker crumbs: They form that delicious traditional base everyone loves
- Unsalted butter: Gives you that mouthwatering rich crust
- Cream cheese: Go with full fat for the smoothest outcome
- Sugar: Cuts through the sharpness of the citrus
- Vanilla extract: Brings extra flavor dimension
- Eggs: Add stability and creaminess to your filling
- Fresh lemon juice and zest: Wakes up the whole dessert with zingy freshness
- Fresh lime juice and zest: Creates more interesting citrus layers
- Chopped pistachios: Add that satisfying crunch and pretty green flecks
- Chopped cherries: Give you little pockets of fruity sweetness in each forkful
- Whipped cream: Tops everything off with cloud-like softness
 Pin it
How To Make It
- Get Your Crust Ready:
- Mix graham cracker crumbs sugar and melted butter till it looks like damp sand. Push it down firmly into your springform pan making sure you've got an even bottom with slightly higher edges. Pop it in a 325°F oven for 10 minutes till barely golden. This quick bake keeps your crust from getting soggy later on.
- Whip Up The Base:
- Beat your cream cheese with sugar until it's totally smooth without any bumps. Don't rush this part if you want that silky texture. Add in vanilla and mix completely. Your mixture should feel light airy and perfectly smooth before moving on.
- Build The Foundation:
- Put in eggs one by one making sure each one disappears into the mix before adding another. This takes time but it's worth it. This careful method gives you the right consistency and helps your cheesecake set up properly.
- Add Your Citrus Kick:
- Mix in lemon juice lime juice and both kinds of zest. Beat until everything's combined. The mix will thin out a bit but should stay pretty thick. Using two citrus fruits makes the flavor way more interesting than just one.
- Throw In The Good Stuff:
- Fold pistachios and cherries in by hand with a spatula not your mixer. Go easy here to keep the batter fluffy while spreading everything around evenly. This gentle touch stops you from overworking the mix which would make your cheesecake heavy.
- Bake It Right:
- Pour everything over your cooled crust and smooth the top gently. Bake for 50-60 minutes until the middle is nearly set but wiggles slightly when shaken. It'll keep cooking as it cools down. You'll know it's done when the surface looks a bit matte with firm edges and a soft center.
When I first brought this cheesecake to our family dinner my uncle who swears he hates anything citrusy ended up asking for another slice and then begged me for the recipe. The way the tangy citrus sweet cherries and earthy pistachios come together wins over even the toughest critics.
No Cracks Allowed
Many folks swear by water baths for cheesecakes but you can skip that hassle with this recipe if you follow some easy tricks. Don't overbeat your mixture especially once the eggs go in. Let all your ingredients sit out till they reach room temp before starting. And the big one cool your cheesecake slowly by turning off the oven and leaving the door slightly open for the first hour. These steps stop those quick temperature shifts that cause ugly cracks.
Getting That Dreamy Texture
The secret to amazing cheesecake texture comes down to how you mix and bake it. Make sure your cream cheese and sugar are totally smooth before you add anything else. Mix in each egg completely before dropping in the next one. And don't peek by opening the oven while it's baking since temperature changes can make it rise and fall unevenly. Done right you'll get that melt-in-your-mouth creaminess that everyone craves.
Prep Ahead Ideas
This cheesecake actually tastes better after a day or two making it perfect when you're busy planning an event. You can make it up to three days before and keep it in your fridge. The flavors will mingle and get even better over time. If you need to store it longer cut it into slices wrap them tight in plastic and foil and freeze for up to a month. Just thaw overnight in your fridge before serving. It'll still taste amazing even after freezing.
 Pin it
The bold flavors and amazing textures in this cheesecake will definitely make it the talk of your next get-together. Savor every mouthful!
Frequently Asked Questions
- → How do I make it gluten-free?
Use gluten-free graham cracker crumbs for the base, and you're good to go.
- → Can I create a dairy-free version?
Swap cream cheese and butter with plant-based versions to make this dessert dairy-free.
- → What’s the secret to avoiding cracks?
Don’t overmix the batter, and leave the cheesecake to cool slowly with the oven door open after baking.
- → Which toppings work best?
Top it off with whipped cream, whole cherries, and pistachios for a striking finish.
- → How long should it chill before eating?
Let it sit in the fridge for at least 4 hours or overnight for the best results.