
 Pin it
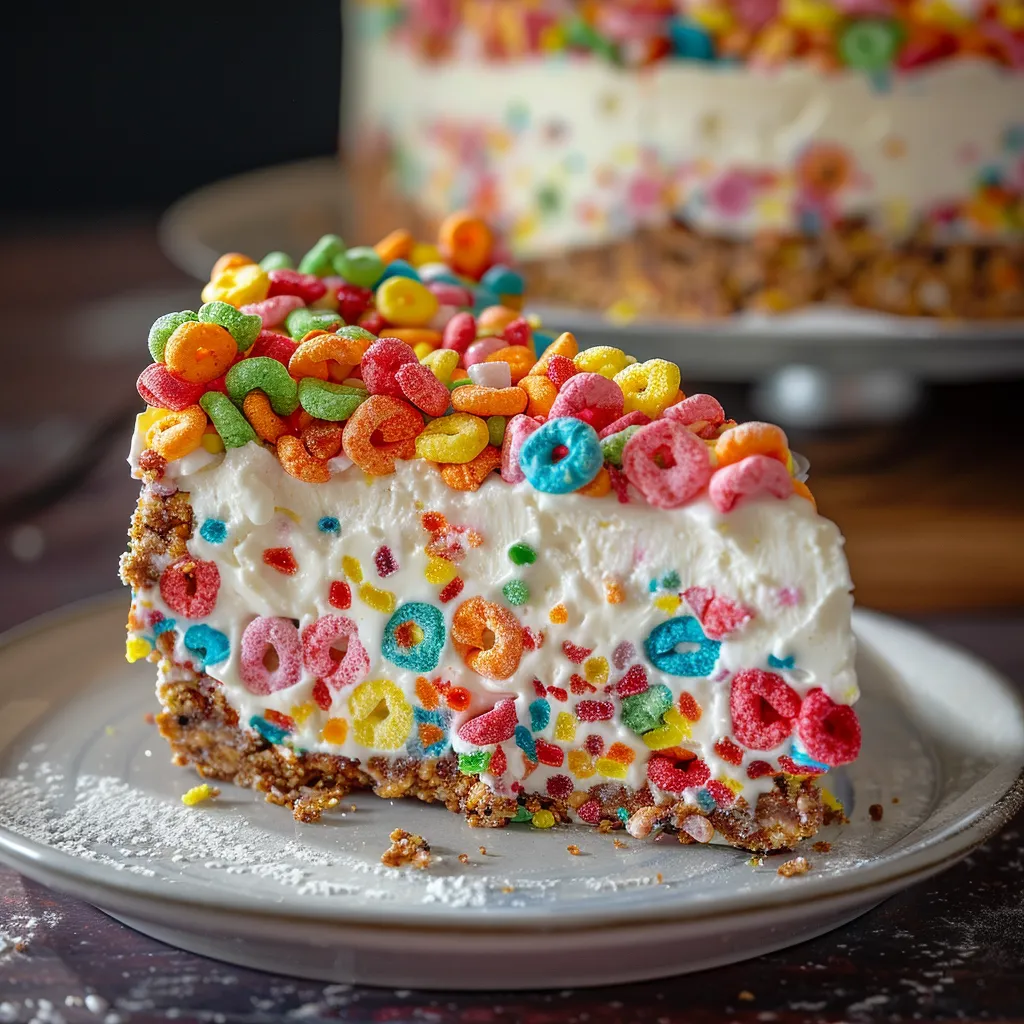
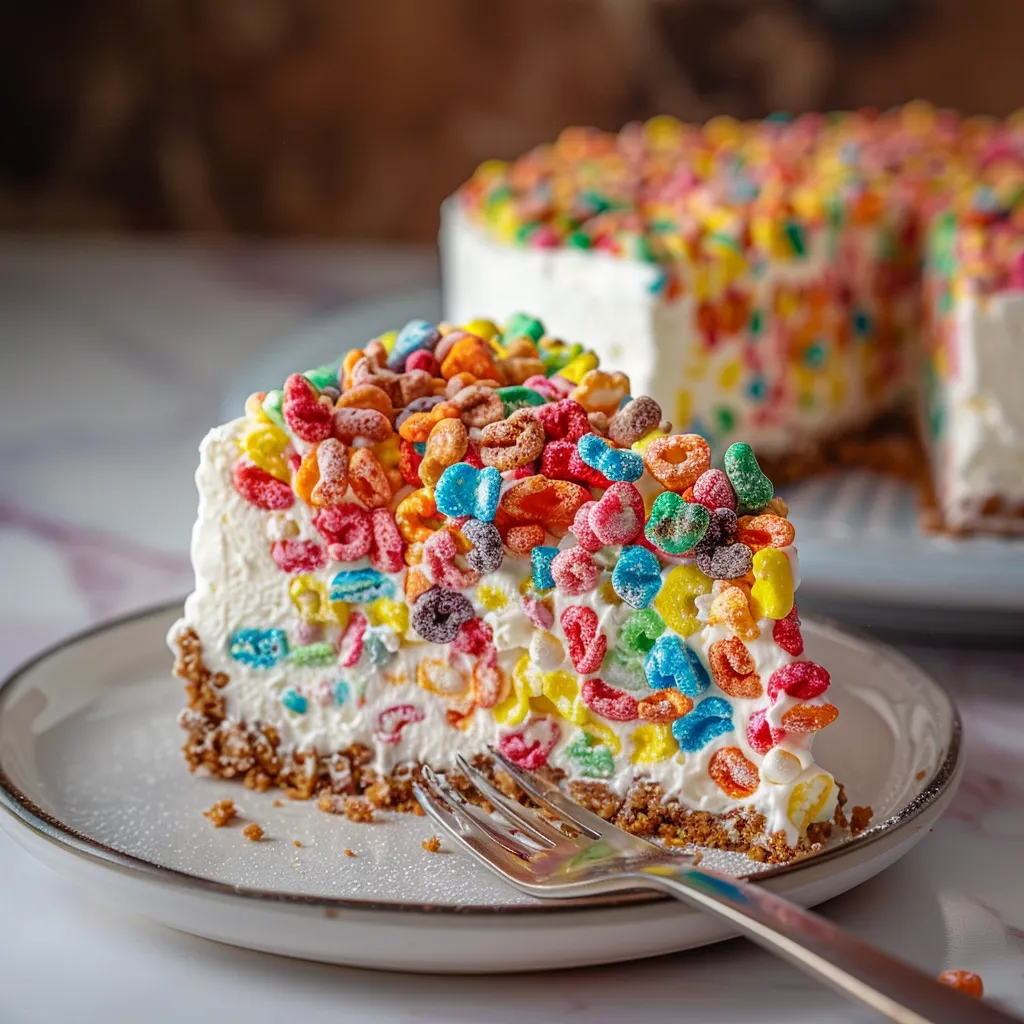
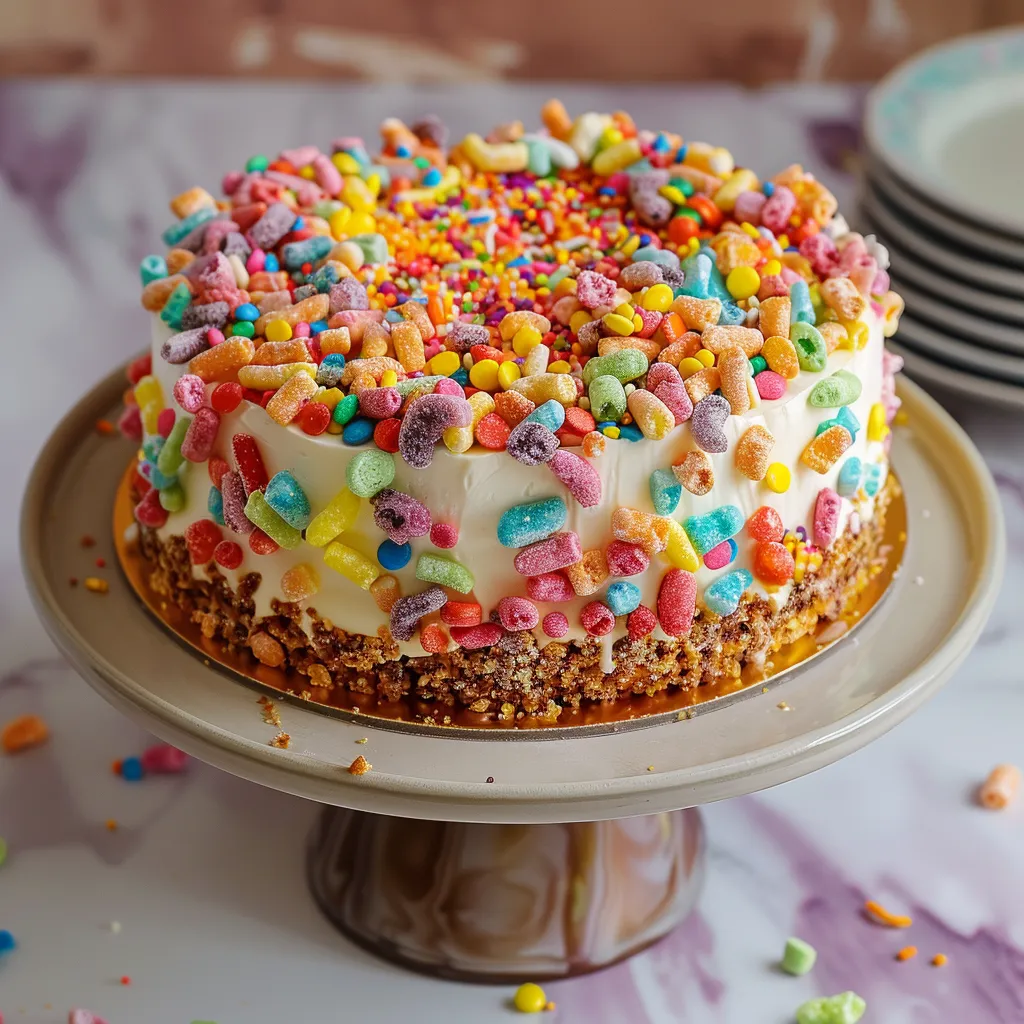
This no-bake Fruity Pebbles Cheesecake turns your childhood favorite cereal into a knockout dessert that pairs smooth, creamy cheesecake with the fun crunch and bright colors of Fruity Pebbles. It's just the thing for birthday parties or when you're craving a bit of nostalgia that'll wow folks young and old alike.
I came up with this treat for my daughter's birthday bash when she asked for something "fun and colorful." When we brought it out, everyone's faces just lit up before they'd even tried a bite.
What You'll Need
- Mini marshmallows: They stick everything together in our crust and give it that classic cereal treat feel
- Salted butter: Cuts through the sweetness and helps melt those marshmallows down nice and smooth
- Fruity Pebbles: Bring all the rainbow colors and fruity punch to both the crust and filling
- Cream cheese: Go for full fat and make sure it's completely softened for the smoothest mix
- Sugar: Adds just enough sweetness without drowning out the cereal flavor
- Heavy cream: Makes everything rich and helps your cheesecake set up nicely
- Lemon juice: Adds a tiny bit of tang to balance all that sweetness
- Vanilla extract: Gives everything more depth alongside those fruity flavors
- Raspberry extract: Boosts those berry notes already in the cereal
- Cornstarch: Helps your no-bake filling stay firm so you can cut perfect slices
- Salt: Brings out all the flavors and keeps it from being too sweet
 Pin it
Making Your Cheesecake
- Get Your Pan Ready:
- Put parchment paper on the bottom and sides of a 9inch springform pan. Don't skip this—it lets your cheesecake come out clean after chilling. Make the parchment stick up a bit above the pan's edge for easy lifting.
- Mix Up The Marshmallow Mix:
- Put your mini marshmallows and butter in a big microwave-safe bowl. Heat them for 30 seconds at a time, stirring after each go, until they're all melted and smooth. This takes about 12 minutes. Don't go too long or your marshmallows will get tough.
- Build Your Rainbow Crust:
- Dump Fruity Pebbles into your melty marshmallow mix and stir fast until everything's coated. While it's still warm, push it firmly into your pan, making an even bottom layer and going about 1½ inches up the sides. A measuring cup works great for pressing it down tight so it won't fall apart later.
- Whip Up The Filling:
- Beat your cream cheese and sugar for a full 2 minutes till it's super smooth with zero lumps. Your cream cheese absolutely must be room temp here. Cold cream cheese will stay lumpy no matter what. Scrape down your bowl really well before adding anything else.
- Mix In The Good Stuff:
- Stir in heavy cream, lemon juice, vanilla, and raspberry extracts just until they're mixed in. Then add cornstarch and salt and mix till combined. This combo makes everything rich and firm without needing eggs or baking.
- Add The Cereal Magic:
- Gently fold Fruity Pebbles into your cream cheese mix by hand with a rubber spatula. Work quick but careful so you don't crush the cereal pieces while making sure they spread evenly through the filling.
- Let It Set Up:
- Pour your filling into the crust and smooth the top with a spatula. Cover it with plastic wrap without touching the surface and stick it in the fridge for 8 hours or overnight. Don't rush this part—it needs all that time to set up right so you can cut nice slices.
My favorite thing about making this cheesecake is seeing how people react when they first spot it. Something about those bright rainbow colors just brings smiles to the table. My daughter wanted extra Fruity Pebbles on top "like confetti" and it turned out to be the perfect finishing touch.
Plan Ahead
This cheesecake gets even better after a day as the flavors mix together and the crust softens a tiny bit. You can make it up to 2 days before you need it, which makes party planning so much easier. Keep it covered in your fridge until about 15 minutes before serving. For the prettiest look, sprinkle those extra cereal pieces on top just before bringing it out.
Mix It Up
What's great about this treat is how easy it is to change up. Try swapping in Cocoa Pebbles for a chocolatey twist or use Cinnamon Toast Crunch for something warm and spicy. You can also switch the raspberry extract for orange or lemon depending on which fruit flavors you want to highlight. For fancy occasions, pour a layer of white chocolate ganache on top before adding your cereal sprinkles for an extra special touch.
How To Enjoy It
This cheesecake cuts best when it's still a bit cold, but tastes amazing when it's just a little warmer. Let it sit out around 15 minutes before digging in. Use a sharp knife dunked in hot water and wiped off between slices for the cleanest cuts. Serve it with some fresh berries for a pretty color contrast or add a small scoop of vanilla ice cream to make it extra special.
 Pin it
Don't forget to keep a few pieces for later—this cheesecake stays good in the fridge and actually tastes even better the next day!
Frequently Asked Questions
- → Can I swap the cereal for something else?
Absolutely, any cereal of your choice can work! Just note that the taste will change with your cereal pick.
- → How long should it chill in the fridge?
Let it chill for at least 8 hours, or overnight, to get the best results.
- → Is a stand mixer required?
A stand mixer is handy for smoother mixing, but a hand mixer can do the job just as well.
- → What can I do if the crust isn't holding together?
Press the cereal mixture down firmly in the pan so it sticks together and forms a solid base.
- → Can I prep this in advance?
Yep, you can make it the day before. Just keep it chilled in the fridge until you're ready to dig in.