
 Pin it
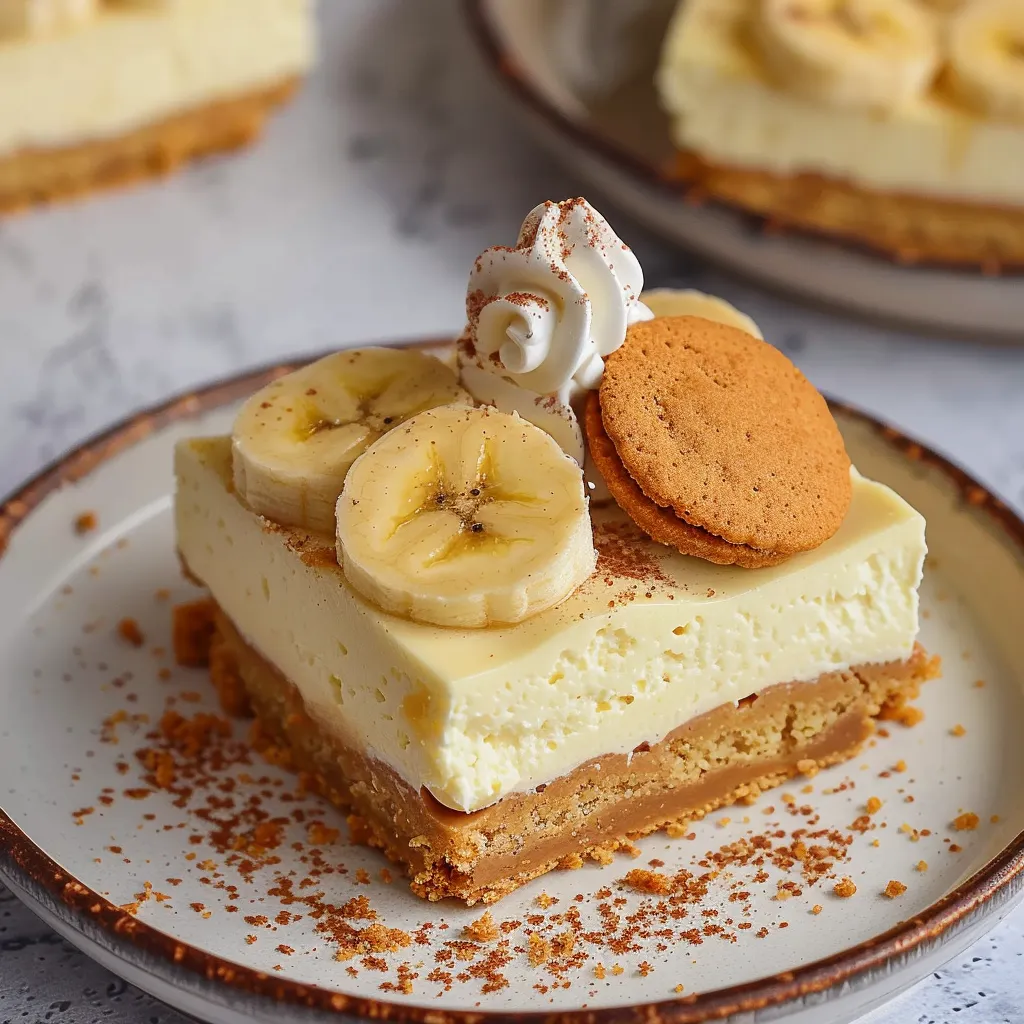
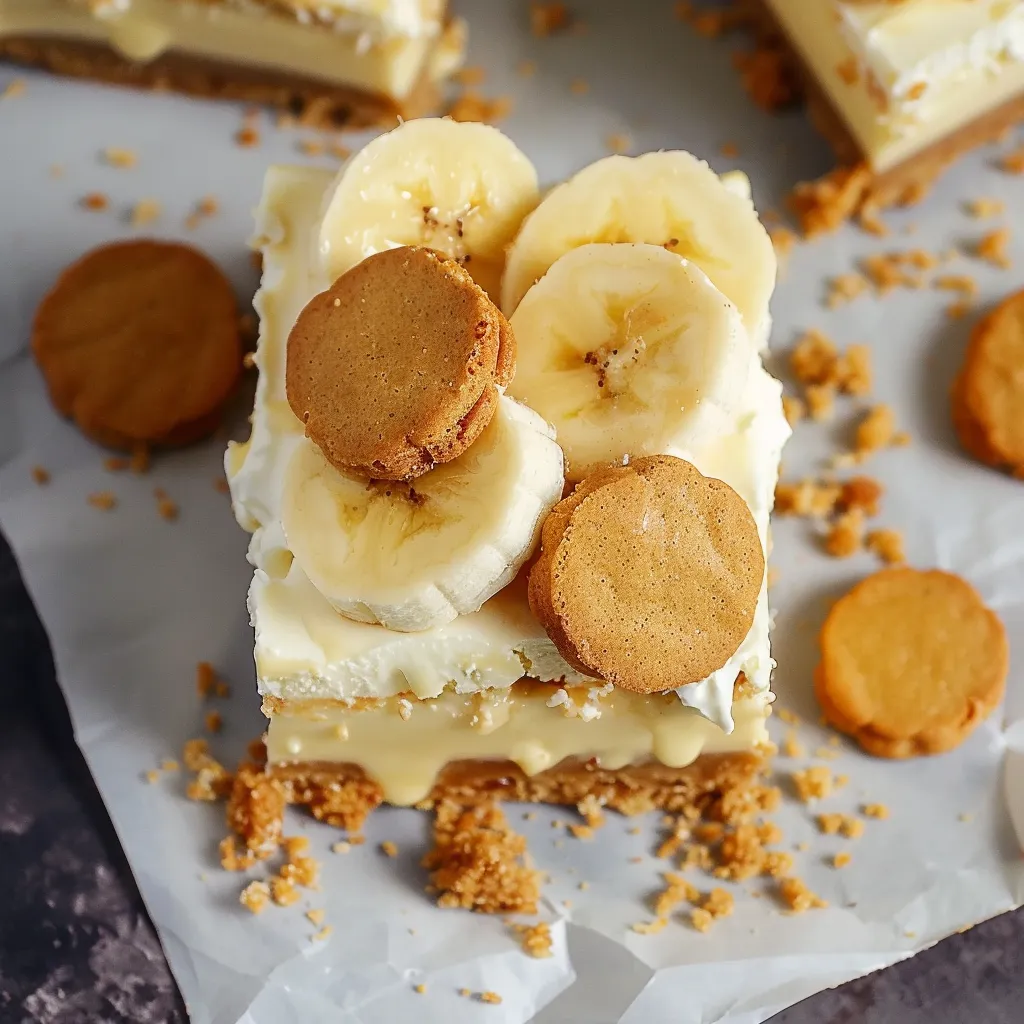
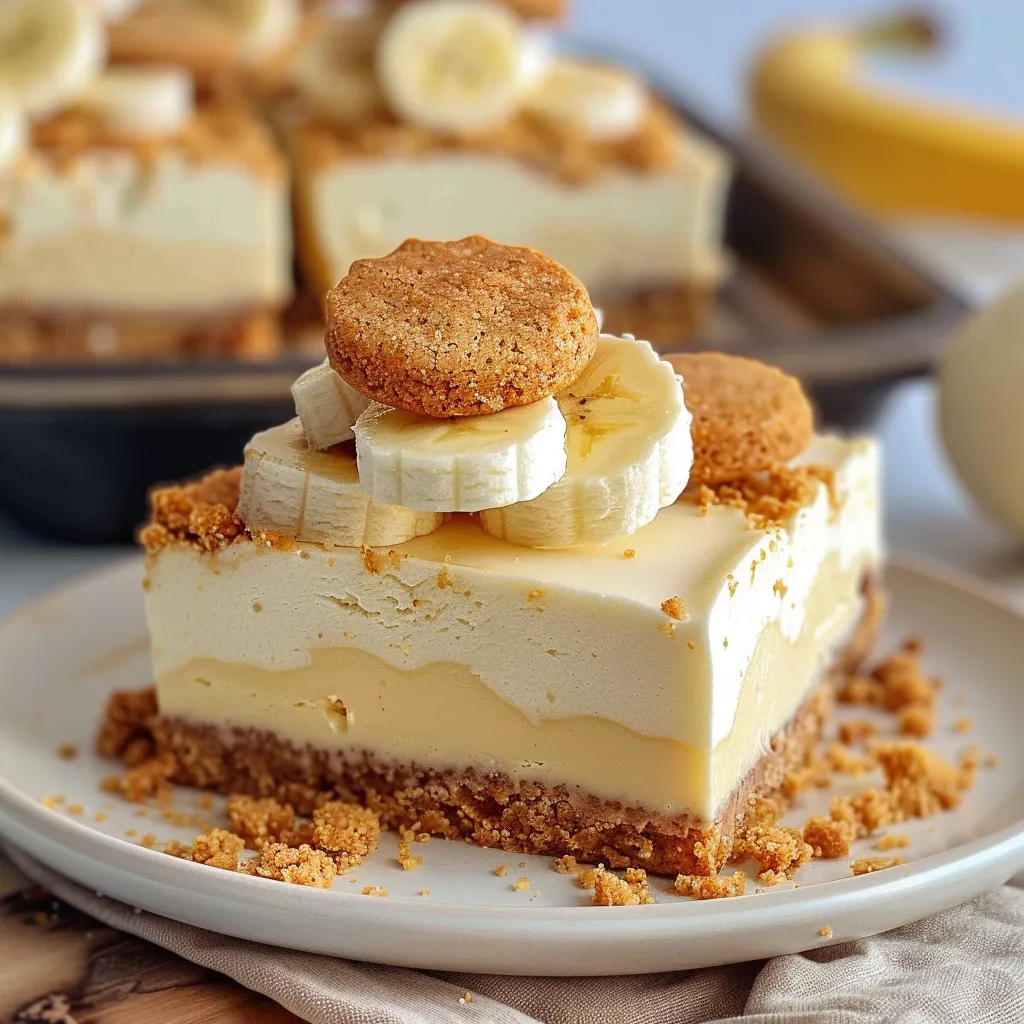
That first mouthful of these Banana Pudding Cheesecake Bars hits you with the smoothest mix of creaminess and that nostalgic banana taste that takes you right back to backyard family parties. The crunchy vanilla wafer bottom perfectly plays against the velvety filling, and the slight tang from the cream cheese works magic with the sweet banana pudding. These treats merge two classic desserts into something fresh yet oddly familiar—a no-bake delight that feels both fancy and utterly satisfying.
I brought these bars to a cookout last year and they vanished quicker than anything else on the dessert table. Even my brother-in-law, who usually stays away from desserts, came back asking how I made them—and trust me, that's about as good as compliments get.
Key Ingredients and Smart Shopping Advice
- Cream Cheese: Go for the full-fat blocks, not the spreadable kind, for the right texture and taste. I always pick Philadelphia since it's got that perfect balance of creaminess and tang.
- Instant Banana Pudding Mix: Stick with Jell-O for the strongest banana kick. Make sure it's instant pudding—the cook-and-serve type won't work for our no-bake approach.
- Vanilla Wafers: Classic Nilla wafers give you that true nostalgic taste, but any crunchy vanilla cookie can do the job.
- Heavy Whipping Cream: Try to find cream with 36% fat or higher—it'll whip up better and make everything richer.
 Pin it
Simple Step-by-Step Directions
- Get Your Pan Ready:
- Put parchment paper in an 8-inch square dish with extra hanging over the sides so you can lift it out later.
- Make the Bottom Layer:
- Smash about 45-50 vanilla wafers into tiny bits to get 2 cups of crumbs. Mix them with 2 tbsp brown sugar, a tiny bit of salt, and 6 tbsp melted butter. Push this mix into your pan and let it chill for 20-30 minutes.
- Mix Your Cheese Blend:
- Beat 16 oz room-temp cream cheese with ½ cup sugar until it's nice and smooth. Stir in ½ cup sour cream and 1 tsp vanilla until everything's mixed well.
- Fix the Pudding Part:
- Whisk 1 cup cold heavy cream with one 3.4 oz box of instant banana pudding until it thickens up.
- Blend Everything:
- Slowly fold your pudding mix into the cream cheese blend until it's all smooth.
- Build and Wait:
- Pour your filling over the cold crust and smooth the top. Cover with plastic and stick it in the fridge at least 8 hours, but overnight works best.
- Cut and Dress Up:
- Use the parchment flaps to pull out your dessert. Cut into 16 squares and top with fresh banana slices, whipped cream, and a vanilla wafer right before you serve.
My first attempt at these bars was a bit of a mess because I got impatient and used cold cream cheese. I ended up with little lumps all through the filling. Now I always set the cream cheese out for at least an hour before I start making these.
Getting the right mix of cream cheese and banana pudding took me a bunch of tries. Too much pudding makes it taste fake, but too little and it's just cheesecake with no banana flavor. I've found that using exactly one package of pudding mix gives the perfect banana taste without going overboard.
You can top these bars however you want while keeping their basic goodness intact. Fresh banana slices work great for everyday serving, but if you're feeling fancy, try some caramelized banana slices for special occasions.
These bars are perfect for parties since you can make them way ahead of time. They actually taste better after sitting in the fridge for 24 hours as all those flavors get to know each other.
These treats bring together two food traditions: good old Southern banana pudding and rich New York cheesecake. The original banana pudding with its layers of vanilla wafers, banana slices, and custard has been an American favorite since the late 1800s.
What makes these Banana Pudding Cheesecake Bars really stand out is how they please almost everyone. People who don't usually go for tangy cheesecake love the familiar banana pudding flavor, while cheesecake fans appreciate how the cream cheese lifts this above regular pudding.
The real fun of sharing these bars isn't just how good they taste—it's watching people take that first bite and seeing their face light up when they taste something that reminds them of childhood but feels grown-up at the same time.
 Pin it
Frequently Asked Questions
- → Can I make these bars a day or two early?
- Definitely! They need at least 8 hours to set, so preparing them a day in advance works perfectly. Just add the banana slices right before serving.
- → How many days will these bars stay fresh?
- These can be kept in an airtight container in the fridge for 3-4 days. Wait to top with fresh banana until you're ready to eat.
- → Is it possible to freeze these cheesecake bars?
- Yes! Just avoid adding fresh banana before freezing. Wrap them tightly and store in a freezer container for up to 2 months. Let them thaw overnight in the fridge before serving.
- → What size banana pudding mix should I buy?
- Use one of the small 3.4-ounce boxes of instant banana pudding mix. This is the standard size you'd usually find in stores.
- → Can I replace the vanilla wafers with graham crackers?
- Sure, graham crackers will work just fine in the same amount. But vanilla wafers add that nostalgic banana pudding taste.