Dry Brine Turkey Guide

Featured in Family Dinners.

Figured out dry brining and it's a total game-changer! Rubbed herbs and salt all over, left it in the fridge for a few days, and cooked it up. Came out juicy, flavorful, and delicious, even the white meat wasn't dry. No mess like wet brining, and the crispy skin? Amazing. I'm never cooking turkey the old way again.
A woman wearing an apron and smiling.
Updated on Fri, 04 Apr 2025 17:48:11 GMT
A juicy, golden turkey served with lemon wedges and herbs, resting on a white plate. Pin it
A juicy, golden turkey served with lemon wedges and herbs, resting on a white plate. | tasteofmoms.com

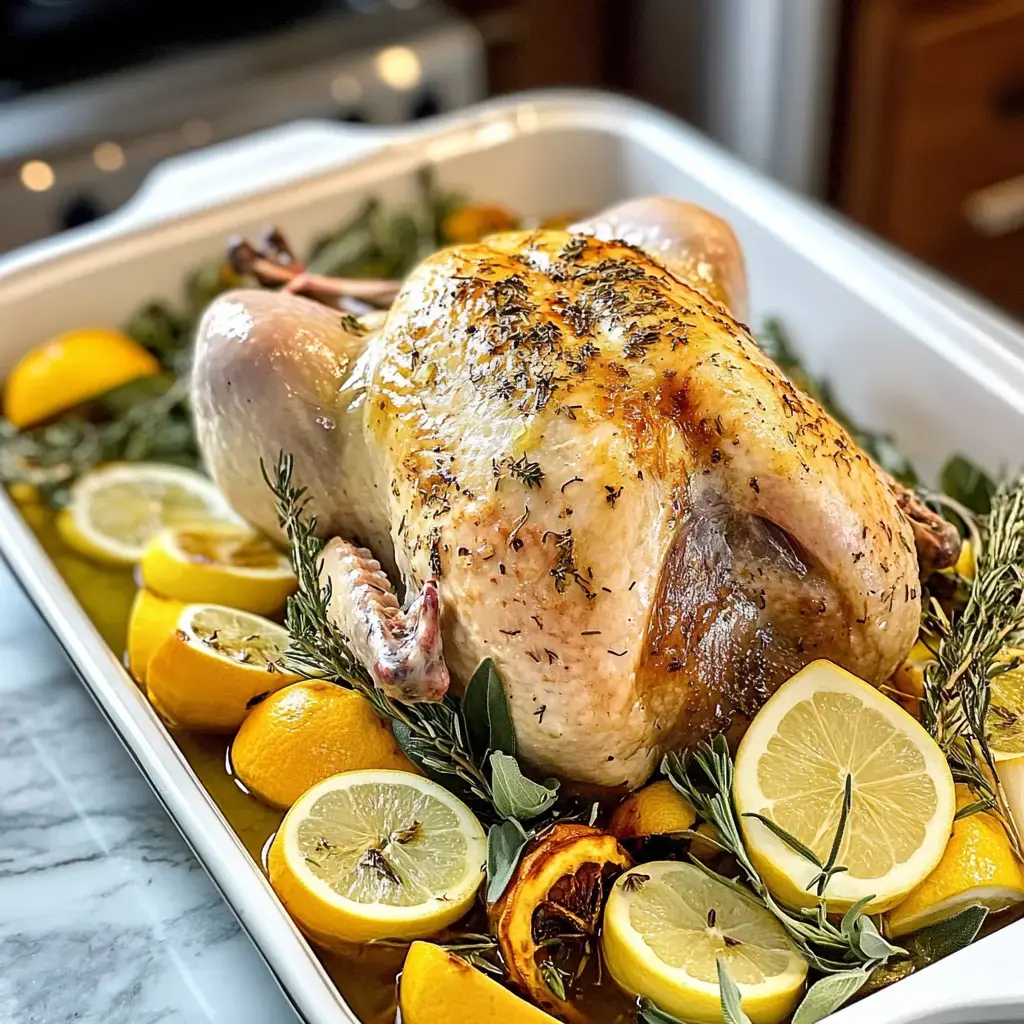
Incredible Turkey Seasoning for the Juiciest Holiday Meal

I've learned that a dry brine gives you the tastiest, most succulent turkey around. Forget those complicated liquid soaks—this easy blend of salt, spices, and herbs does the trick by itself. You'll get super crunchy skin while keeping the meat incredibly juicy. Once you try this approach, your holiday bird will never be prepared any other way.

How This Turkey Brine Transforms Your Cooking

This seasoning technique works wonders. Salt draws out moisture first, then everything soaks back in, making your turkey way more flavorful and soft. It's so much simpler than old-school wet brining methods, and you'll end up with that crackling skin that everyone wants seconds of.

Your Ingredients

  • Kosher Salt: Diamond Crystal works great because it coats everything nicely.
  • Dried Herbs: That wonderful combo of rosemary, thyme and sage always hits the spot.
  • Black Pepper: Grinding it yourself really boosts the flavor.
  • Turkey: Just make sure it's fully defrosted and doesn't have added seasonings.

Brining Steps Made Simple

Blend Your Spices
Stir together salt, herbs and pepper in a container—nothing complicated here.
Prep Your Bird
Remove all the giblets and wipe the turkey down with paper towels until dry.
Make Pockets
Carefully lift the skin away from the meat to create room for your seasoning blend.
Apply Thoroughly
Massage your mixture everywhere—beneath skin, cavity, and outer surface.
Time to Wait
Stick it in the refrigerator uncovered and let it sit for up to three days to work its magic.
A beautifully roasted turkey garnished with fresh herbs and surrounded by lemon slices in a white roasting pan. Pin it
A beautifully roasted turkey garnished with fresh herbs and surrounded by lemon slices in a white roasting pan. | tasteofmoms.com

Extra Turkey Wisdom

Go for unseasoned, natural turkey without any added salt. Let it sit at least 24 hours in the fridge—72 hours is even better. Then cook it your favorite way—roast it, throw it on the grill, or drop it in the fryer. You won't believe how good it tastes.

Frequently Asked Questions

→ Why is dry brining better than wet brining?

Dry brining makes things simpler, is less messy, and gives you crispier skin along with juicy meat.

→ Do I have to rinse the turkey after brining?

No need to rinse it. The salt gets absorbed completely, and rinsing could make a mess in your kitchen.

→ How long does dry brining take?

A single day works fine, but for really great results, let it sit for three days to soak in all the flavor.

→ Can I use regular table salt instead of kosher?

Stick with kosher salt—table salt is finer and could make your turkey overly salty!

→ Why leave the turkey uncovered in the fridge?

Letting it sit uncovered helps the skin dry out so it gets wonderfully crispy when roasted.

Dry Brine Turkey Method

An easy, no-fail way to dry brine your turkey. Perfectly salted and seasoned meat that's tender and tasty for any celebration.

Prep Time
30 Minutes
Cook Time
~
Total Time
30 Minutes
By: Ashley

Category: Family Dinners

Difficulty: Intermediate

Cuisine: American

Yield: 1 whole turkey

Dietary: Low-Carb, Gluten-Free, Dairy-Free

Ingredients

01 1 entire turkey, weighing 14 to 16 pounds.
02 3 tablespoons of kosher salt.
03 3/4 teaspoon ground black pepper.
04 1 1/2 teaspoons dried herbs like rosemary, sage, or thyme.

Instructions

Step 01

Combine the salt, pepper, and dried herbs in a small bowl.

Step 02

Take out the neck and giblets hiding inside the turkey.

Step 03

Use paper towels to dry the turkey completely.

Step 04

Gently pull the skin loose over the legs and breast area.

Step 05

Sprinkle 2 teaspoons of the salt mixture inside the cavity.

Step 06

Massage 4 teaspoons of the mixture under the turkey breast's skin.

Step 07

Use 2 teaspoons of seasoning under the skin covering the legs.

Step 08

Spread whatever seasoning mix is left all over the turkey's surface.

Step 09

Fold the wings under the breast to keep them in place.

Step 10

Leave the turkey in the fridge, uncovered, for 1 to 3 days.

Notes

  1. Make sure to stick with kosher salt, not table salt.
  2. Double-check that the turkey hasn't been pre-salted.
  3. Don't rinse it after brining—it’s not needed.
  4. Leaving it for three days gives the best flavor.
  5. Once brined, your turkey’s ready for the oven.

Tools You'll Need

  • A roasting pan or rimmed baking sheet.
  • A small mixing bowl.
  • Paper towels for drying.

Allergy Information

Please check ingredients for potential allergens and consult a health professional if in doubt.
  • No allergens reported.

Nutrition Facts (Per Serving)

It is important to consider this information as approximate and not to use it as definitive health advice.
  • Calories: 290
  • Total Fat: 12 g
  • Total Carbohydrate: ~
  • Protein: 45 g