
 Pin it
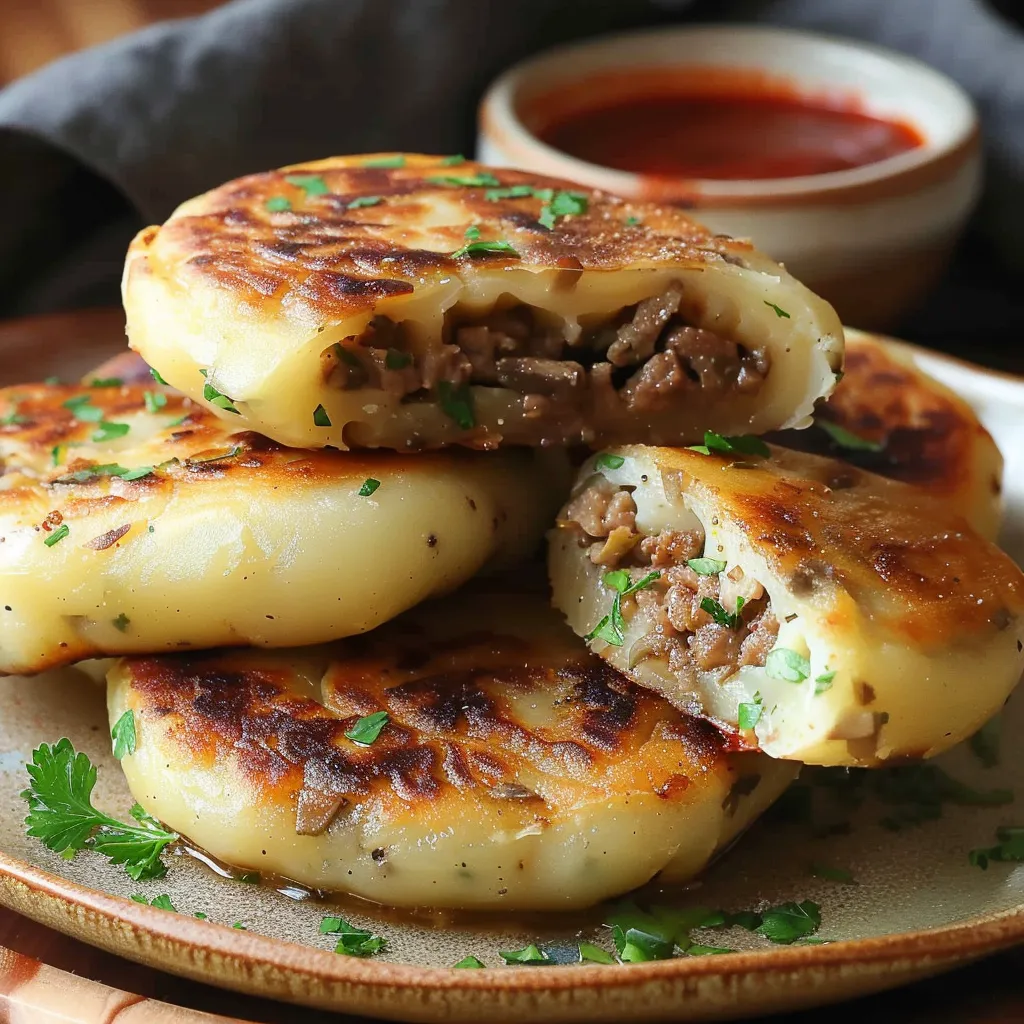
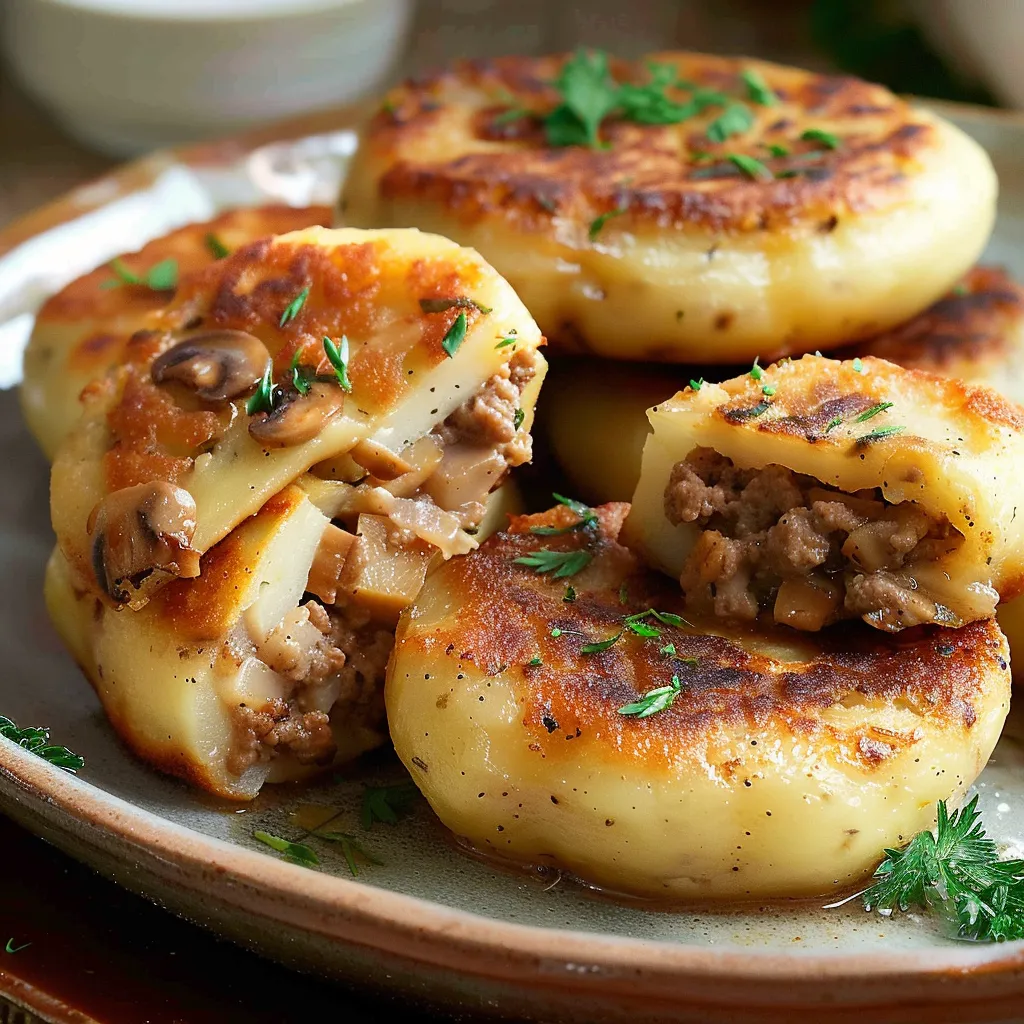
Think about sinking your teeth into a crispy, golden potato patty that melts into a fluffy middle with a tasty core of well-seasoned beef and mushrooms. These Filled Potato Patties are pure comfort on a plate – each mouthful gives you that perfect mix of textures and tastes that feels both familiar and fancy at once. I've tweaked this recipe countless times over the years to nail that balance between the tender potato shell and the rich filling that makes them so darn good.
When I first made these for my family get-together, I watched my uncle take one bite, shut his eyes briefly, then carefully slice his single potato patty into tiny bits to savor it longer. That told me I'd stumbled onto something truly special.
Key Ingredients and Smart Selection Advice
- Potatoes: Go for starchy ones such as Russets or Yukon Golds that'll give you a smooth, shapeable mix. Their high starch helps everything stick together without getting sticky. Russets give you the lightest texture, while Yukon Golds bring a slightly richer taste.
- Ground Meat: Pick meat around 7-10% fat, giving enough juice and flavor without making things greasy. Ground turkey works great for something lighter, while ground pork adds extra richness.
- Mushrooms: Don't leave these out, even if you're not crazy about mushrooms! They add that deep savory kick and bulk up the meat filling. Baby bella mushrooms pack more flavor than white ones, but either kind works fine.
- Herbs and Spices: Sweet paprika mixed with herbes de Provence creates a tasty, aromatic filling that doesn't take over the other ingredients. The paprika also gives the filling a nice color when you cut into the patties.
 Pin it
Your potato quality really matters for how these turn out. I've noticed that older potatoes actually work better than super fresh ones because they have less moisture and make a more workable dough. When you're shopping, pick firm potatoes without any green spots or sprouts, and try to get ones that are roughly the same size so they cook evenly.
Step-by-Step Cooking Guide
- Get Your Potato Base Just Right:
- Peel 2 pounds of potatoes and chop them into 1-inch pieces. Toss them in a big pot, cover with cold water, add 1 teaspoon of salt, and boil them up. Turn down the heat and simmer until soft enough to stick a fork in, about 15-20 minutes. Drain them well, put them back in the pot for a minute to dry out, then mash until smooth. Spread them on a baking sheet to cool completely.
- Make a Tasty Filling Base:
- Warm up 2 tablespoons of oil in a large pan over medium heat. Toss in 1 finely chopped onion and cook until see-through, about 5 minutes. Add 8 ounces of finely chopped mushrooms and cook until all the liquid is gone and they start to brown, around 7-10 minutes.
- Build Rich Flavors in Your Meat Mix:
- Add 1 pound of ground meat to your onions and mushrooms. Season with 1 teaspoon sweet paprika, 1 teaspoon herbes de Provence, 1 teaspoon salt, and 1/2 teaspoon black pepper. Cook until fully browned, then sprinkle 1 tablespoon of flour over everything, stirring for 1 minute. Move it to a plate to cool completely.
- Nail the Filling Texture:
- Once cool, put your meat mixture in a food processor. Add 2 tablespoons of tomato paste and pulse 5-6 times until it comes together but still has some texture. Taste and add more seasoning if needed.
- Mix Up the Perfect Potato Dough:
- Put your cooled mashed potatoes in a bowl. Mix in 1 beaten egg and 1/2 teaspoon salt. Slowly work in 1/2 cup of flour until just combined. Your dough should be soft but not sticky, and hold its shape when formed.
- Stuff Them Like a Pro:
- Dust your counter with flour. Split the potato dough into equal portions and flatten each into a circle about 4 inches across. Drop 1 1/2 tablespoons of filling in the middle and pinch the edges closed around it. Gently press down to about 3/4 inch thick.
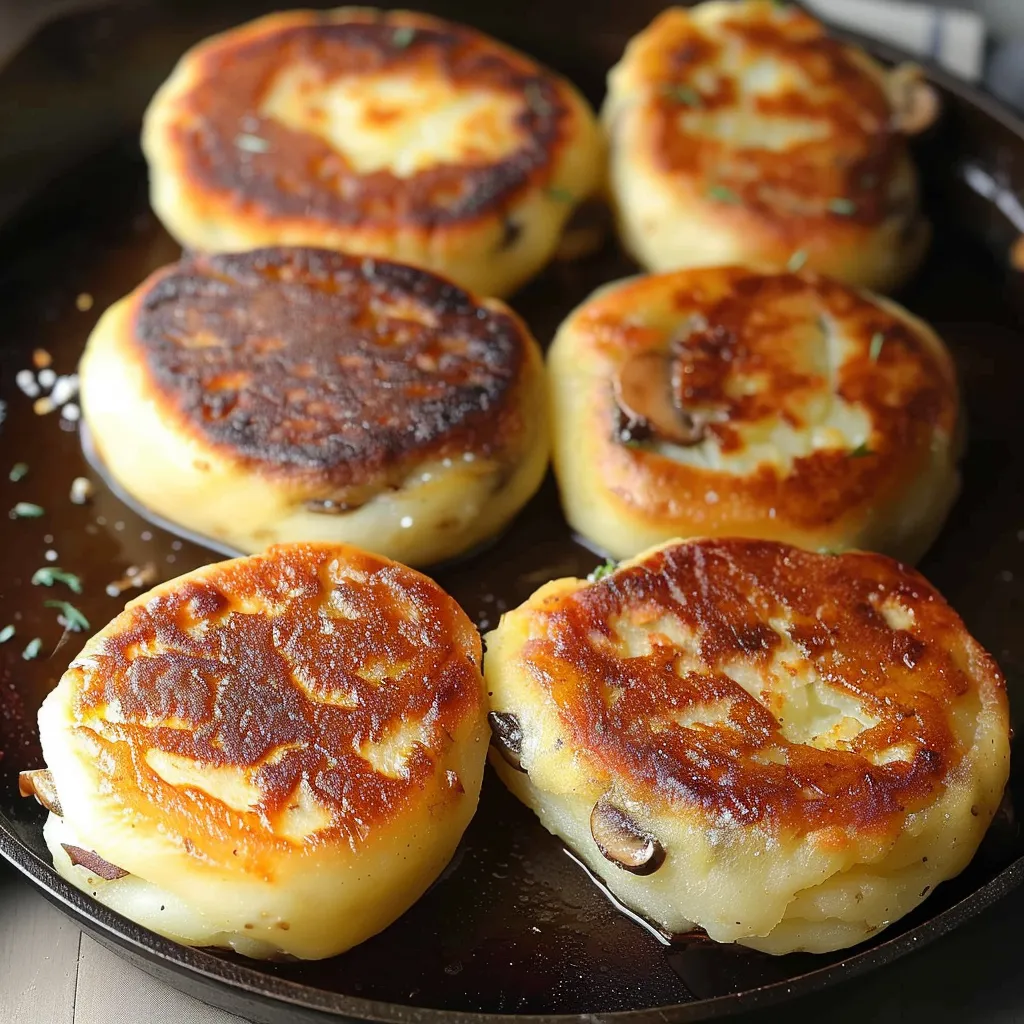
- Cook Them to Perfection:
- Heat 3 tablespoons of oil in a pan over medium heat. Cook 3-4 patties at a time for 3-4 minutes on each side until golden brown. Place them on a paper towel-lined plate while you finish cooking the rest.
- Serve Them at Their Best:
- These taste best warm, right after cooking. If you need to keep them hot, place them on a wire rack in a 200°F oven.
I learned about cooling everything completely through a kitchen disaster I won't forget. Trying to rush dinner one night, I used still-warm potatoes and ended up with a sticky mess I couldn't shape at all. We ordered takeout that night. Now I often make the potatoes and filling a day ahead, which not only makes assembly faster but actually makes everything taste better as the flavors have time to mix and mingle.
When I first made these for my kids, I was sure they'd pick out the mushrooms from the filling. Instead, they wolfed them down, asked for seconds, and wanted them packed in their lunchboxes next day. The mushrooms had blended into the meat so well that their usual veggie suspicion never kicked in – a small win in my ongoing battle to broaden their food horizons.
 Pin it
Frequently Asked Questions
- → Can I prepare the dough and filling early?
- For sure, you can make both parts a day ahead and store them separately in the fridge. Just let them warm up to room temperature before assembling since cold potato dough can crack when shaped.
- → What are alternatives to ground turkey or pork?
- Pretty much any ground meat works well—try beef, chicken, lamb, or even a mix. For a vegetarian twist, swap the meat for extra mushrooms or throw in sautéed veggies like carrots or peppers.
- → Why is my potato dough so sticky?
- Sticky dough means your potatoes held onto too much water. Drain them fully after boiling, and toss them back into the pot for 30 seconds to dry out. If your dough is already sticky, sprinkle in just enough flour to fix it, but don’t overdo it.
- → Can I bake the cakes instead of frying?
- Sure thing! Bake them at 375°F (190°C) for 20-25 minutes until golden, brushing them with oil before baking. They won't be as crispy as fried, but they'll still taste great.
- → How do I stop the cakes from falling apart while cooking?
- Cool your mashed potatoes completely before making dough. Warm dough is tricky to manage! Also, make sure the filling isn’t wet, and let one side brown fully before flipping to avoid breaking them apart.