Cadbury Mini Chocolates

Featured in Appetizers & Snacks.

These tiny Cadbury-inspired sweets bring back the joy of Easter with every bite! Made using mini molds, this simple technique turns what could be tricky into something anyone can make. Layers of chocolate sandwich a creamy white center with a vivid orange dollop in the middle, perfectly mimicking the iconic treat. Smart tips help with everything from smooth melting chocolate to creating that signature two-tone filling. With 48 pieces to share, these delightful candies are perfect for baskets, parties, or whenever you’re feeling nostalgic for a seasonal favorite.
A woman wearing an apron and smiling.
Updated on Sat, 24 May 2025 16:27:32 GMT
A chocolate dessert with creamy filling and orange topping. Pin it
A chocolate dessert with creamy filling and orange topping. | tasteofmoms.com

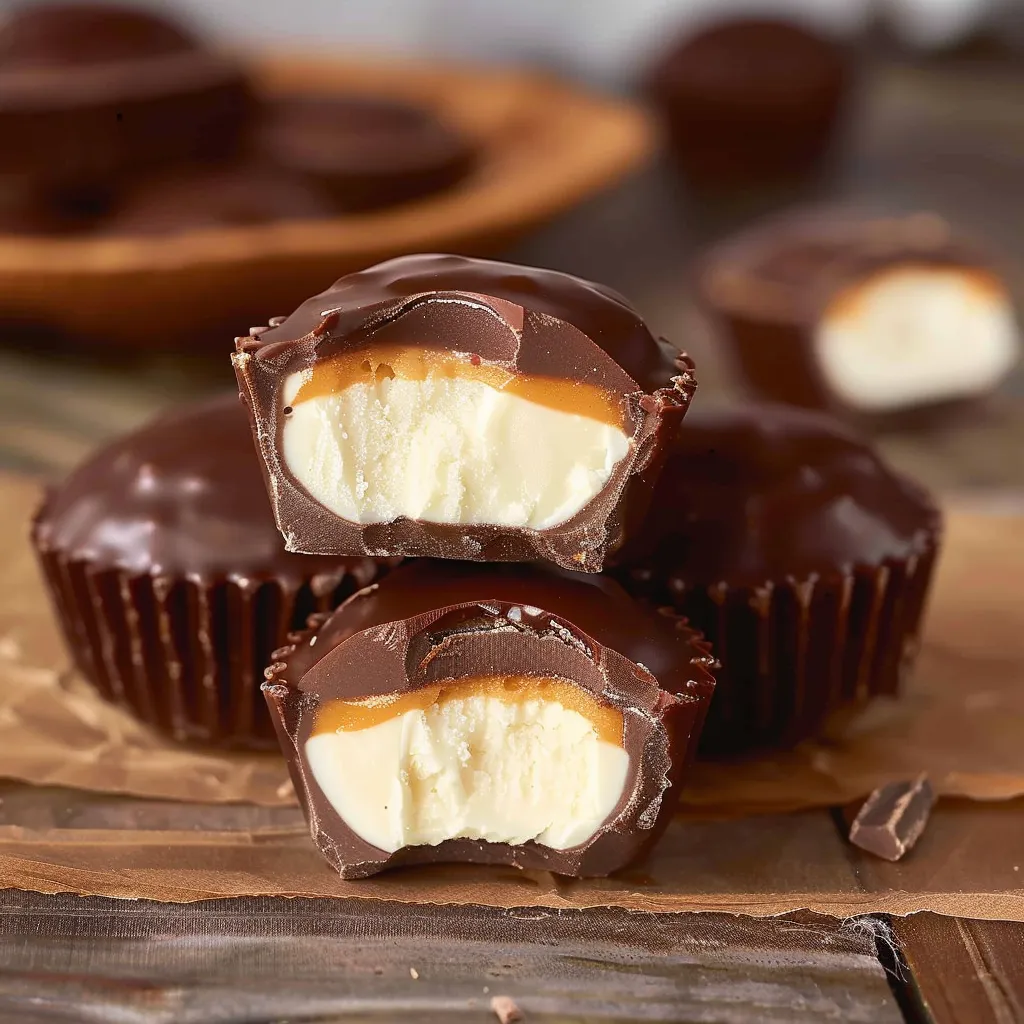
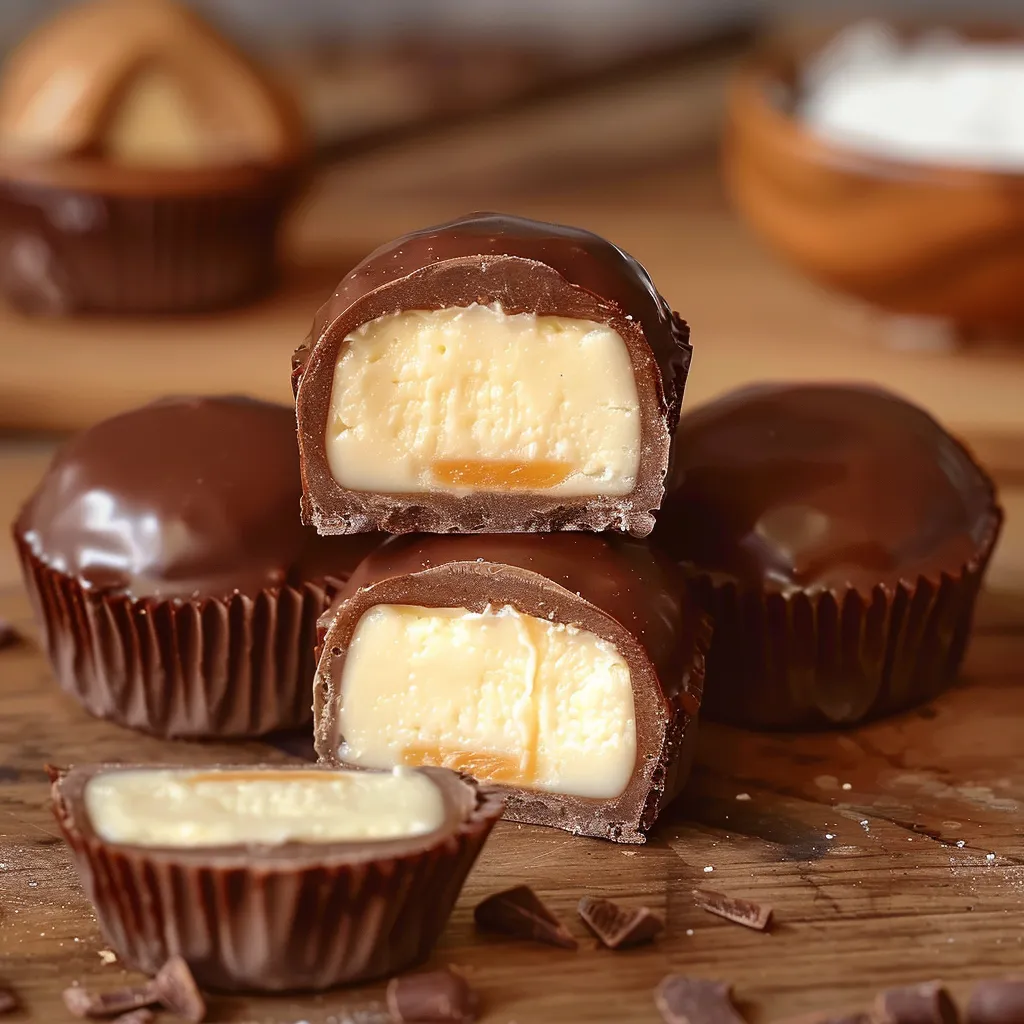
Take one bite of these homemade Cadbury Creme treats and you'll be swept away by sweet memories - that satisfying snap of rich milk chocolate breaking open to show off the smooth, creamy center with its fun "yolk" surprise that brings all the Easter joy in just one mouthful.

What Makes This Treat Special

When I brought these to our family Easter get-together last year, my Cadbury-obsessed cousin couldn't believe how much they tasted like the real thing.

Key Ingredients and Shopping Advice

  • Milk Chocolate: Go for high-quality milk chocolate that's at least 30-35% cocoa from the baking section.
  • Butter: Grab unsalted butter and let it soften slightly before using.
  • Corn Syrup: The light variety helps your filling stay smooth and keeps sugar crystals from forming.
  • Food Coloring: Stick with gel colors for bright hues that won't thin out your mixture.
A plate full of chocolate candies with cream filling. Pin it
A plate full of chocolate candies with cream filling. | tasteofmoms.com

Simple Step-by-Step Process

Step 1:
Set Everything Up - Start by putting parchment paper liners in a 24-cup mini muffin tray.
Step 2:
Form the Chocolate Shells - Melt your milk chocolate in the microwave or double boiler, then pour some into each liner.
Step 3:
Whip Up the Filling - Mix butter, corn syrup, milk, and vanilla until they're smooth, then add powdered sugar.
Step 4:
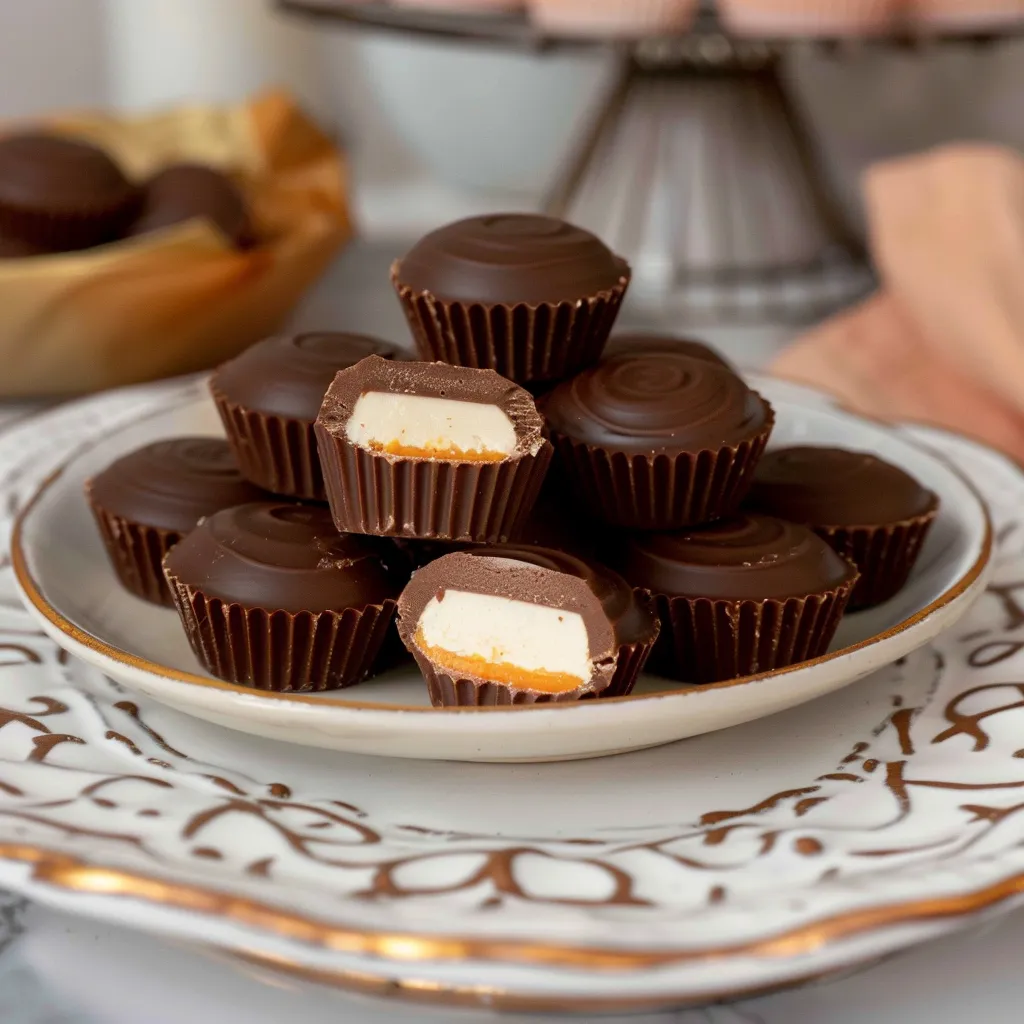
Make Your Two Colors - Split the filling and color one portion orange to look like an egg yolk.
Step 5:
Fill With Care - Add the white filling first, then put a small dollop of orange in the middle.
Step 6:
Finish With Chocolate - Pour more melted chocolate on top to cover everything and make sure it's sealed nicely.

Important Notes

I was really worried about getting that orange "yolk" center right the first time I made these, but it turned out to be the easiest part of the whole thing.

Smart Tricks for Best Results

These sweet bites bring together that nostalgic Cadbury flavor in a way that's totally doable for home bakers.

A table with a variety of chocolate desserts, including chocolate cups and chocolate cakes. Pin it
A table with a variety of chocolate desserts, including chocolate cups and chocolate cakes. | tasteofmoms.com

Frequently Asked Questions

→ Why are piping bags recommended here?
Piping bags help you layer everything just right. They make it easy to get that classic chocolate base, neat white filling, and perfect orange center. If you don’t have them, zip-top bags with a corner cut off work fine too!
→ How can I stop chocolate from clumping when I melt it?
Keep all your utensils dry (even one drop of water can mess things up). Melt your chocolate slowly, in quick bursts. A little coconut oil or shortening can also help keep it smooth!
→ Can I tweak the size of these treats?
Totally! Tiny liners make mini bites, while big cupcake liners are for oversized treats. Just tweak how much filling and chocolate you use, and remember that larger ones need more fridge time to set.
→ Why does the nutrition info seem way off?
The serving size is probably listed as just one gram. That doesn’t reflect a whole piece! Each bite’s real numbers depend on its ingredients—divide the totals by 48 to estimate.
→ Do these need to stay in the fridge?
Yes, it’s best to store them chilled since the filling has butter and might melt if left too long at room temp. They’re okay out for about 2 hours when serving but pop them back in the fridge after.

Cadbury Mini Chocolates

Handmade tiny chocolate shells with a fun, creamy center inspired by Cadbury eggs, crafted in small cupcake molds for an easy-to-make candy.

Prep Time
60 Minutes
Cook Time
2 Minutes
Total Time
62 Minutes
By: Ashley


Difficulty: Intermediate

Cuisine: American

Yield: 48 Servings (48 small treats)

Dietary: Vegetarian, Gluten-Free

Ingredients

→ Chocolate Base Layers

01 2 packs of milk chocolate (16 oz each), fully melted

→ Creamy Center

02 1 cup of light corn syrup
03 1 stick of softened butter (½ cup)
04 2 teaspoons vanilla
05 6 cups powdered sugar
06 ½ teaspoon salt
07 2 tablespoons of milk

→ Color Additions

08 2 drops of orange gel food dye
09 1 drop of yellow gel food dye

Instructions

Step 01

Get 48 mini muffin liners and place them in the wells of mini muffin pans to use as molds.

Step 02

In a microwave-safe bowl, add 16 oz of milk chocolate. Microwave it on high for 30 seconds, stir completely, then heat it again in 20-second bursts, stirring each time, until smooth.

Step 03

Use a piping bag to squeeze a small layer of the melted chocolate into each lined muffin cup. Tap the pan against the counter to spread the chocolate evenly across the bottom. Store any unused chocolate back in the bowl for later.

Step 04

Using a stand mixer, beat corn syrup with softened butter until creamy. Add in salt, milk, and vanilla before slowly mixing in powdered sugar. Combine until it's smooth and firm.

Step 05

Take a third of the finished creme and place it in a mixing bowl. Add 2 drops of orange dye and 1 drop of yellow dye, stirring thoroughly until the color is even. Put the orange-tinted creme into its own piping bag, while the white filling goes into another piping bag.

Step 06

Cut the tip of the bag holding the white creme to make a ½-inch opening. Pipe a thick layer of this creme directly on top of the chocolate layer in each muffin cup.

Step 07

Using a new piping bag tip that’s about ¼ inch wide, pipe just a little orange creme at the center of the white filling in each cup. Give the pan a little tap so everything flattens out nicely.

Step 08

Mix the remaining 16 oz of milk chocolate with the leftover melted chocolate. Use the same microwave method (20-second heating bursts, stirring in between) until all the chocolate is smooth and ready for use. Pour it into a fresh piping bag.

Step 09

Pipe melted chocolate over the creme layers, covering completely from edge to edge. Tap the pan lightly on the counter for a clean and even top surface.

Step 10

Pop the pans in the fridge for about 30 minutes, or until the chocolate fully hardens. Once they’re set, you can eat or store them.

Notes

  1. They taste like Cadbury Creme Eggs but are cuter and smaller, making them perfect for springtime treats or Easter gatherings!
  2. The creme will level out on its own, so don’t stress over uneven layers while piping. For smooth results, let it sit a bit before sealing it up with chocolate.

Tools You'll Need

  • Mini muffin pans
  • Small paper cupcake liners
  • Electric stand mixer
  • Disposable piping bags
  • Bowl safe for microwave use

Allergy Information

Please check ingredients for potential allergens and consult a health professional if in doubt.
  • Includes milk products (butter, milk, chocolate)

Nutrition Facts (Per Serving)

It is important to consider this information as approximate and not to use it as definitive health advice.
  • Calories: 96
  • Total Fat: 2 g
  • Total Carbohydrate: 20 g
  • Protein: ~